

वीडियो एडिटिंग के लिए क्लाइंट कहां से ढूंढे?🎬 10+ ऐसे तरीके जो वाकई काम करते हैं
वीडियो एडिटिंग के लिए क्लाइंट कहां से ढूंढे? | 10+ असरदार तरीके जो वाकई काम करते हैं प्रो गाइड 2025 वीडियो एडिटिंग के लिए क्लाइंट कहां से ढूंढे? 🎬 10+ ऐसे तरीके जो वाकई काम करते हैं प्रो. विक्रम सिंह (वीडियो एडिटिंग कोच) 11 मई 2026 · अपडेटेड 8 मिनट रीड 📌 सच्चाई: वीडियो एडिटिंग की डिमांड बढ़ रही है (YouTube, रील्स, कॉर्पोरेट), लेकिन सही क्लाइंट्स तक पहुंचना चुनौती है। अगर आपके पास दमदार स्किल्स हैं और सही जगहों पर प्रयास करें, तो स्थिर आय और प्रीमियम प्रोजेक्ट्स मिलना तय है। नीचे वो प्रोवेन स्ट्रेटेजीज़ हैं जिनसे मेरे 200+ स्टूडेंट्स ने क्लाइंट्स जीते। 1️⃣ फ्रीलांस मार्केटप्लेस (Upwork, Fiverr, Freelancer) फ्रीलांस साइट्स पर प्रोफाइल ऑप्टिमाइज़ करें Upwork, Fiverr, Freelancer, PeoplePerHour – यहाँ ₹500 से लेकर ₹50,000+ तक के प्रोजेक्ट्स मिलते हैं। लेकिन सिर्फ प्रोफाइल बनाने से काम नहीं चलेगा। प्रोफेशनल पोर्टफोलियो: अपने बेस्ट 3 एडिट्स का शोरियर (बिफोर-आफ्टर) जरूर दिखाएं। शुरुआत में कम रेट से शुरू करें: पहले 2-3 प्रोजेक्ट्स रेफरल के लिए लीजिए, रेटिंग बढ़ाएं। प्रोजेक्ट प्रपोजल में कस्टमाइज़ेशन: एक जैसी कॉपी-पेस्ट प्रपोजल न भेजें। क्लाइंट की समस्या पढ़कर समाधान बताएं। वर्किंग टिप: Fiverr पर “वीडियो एडिटर फॉर यूट्यूब शॉर्ट्स” जैसा निश्चित gig बनाएं। ऑर्डर पाने के लिए पहले 7 दिन ₹299 प्राइस रखें, फिर बढ़ाएं। 2️⃣ LinkedIn: डायरेक्ट कनेक्ट करें कंटेंट क्रिएटर्स और ब्रैंड्स से LinkedIn प्रोफाइल = आपकी डिजिटल रिज्यूमी LinkedIn पर आप YouTubers, पॉडकास्टर्स, मार्केटिंग एजेंसी ओनर्स, स्टार्टअप फाउंडर्स को सीधा मैसेज भेज सकते हैं। ये लोग हमेशा अच्छे एडिटर की तलाश में रहते हैं। प्रोफाइल में “वीडियो एडिटर | एडोब प्रीमियर प्रो | डाविंची रिज़ॉल्व” टाइटिल लिखें। एक पोर्टफोलियो लिंक (YouTube या वेबसाइट) अटैच करें। रोज 5-10 रिलेवेंट लोगों को कनेक्ट रिक्वेस्ट भेजें और छोटा नोट लिखें: “Hi, I saw your channel, I can help boost your video quality. Portfolio attached.” 3️⃣ Instagram & YouTube: अपनी स्किल को वायरल करें शोकेस बनाएँ, क्लाइंट्स खुद आएंगे रील्स और शॉर्ट्स का दौर है – आप एडिटिंग का मैजिक दिखाएं (सिनेमैटिक ट्रांजिशन, कलर ग्रेडिंग, मोशन ग्राफिक्स) और हैशटैग #videoeditor #clientsneeded #editingreel लगाएं। स्क्रॉल करने वाला क्लाइंट खुद डीएम करेगा। प्रो स्ट्रेटजी: किसी ट्रेंडिंग सॉन्ग पर अपना कस्टम एडिट क्लिप बनाएं और पिन करें। साथ ही “affordable video editing for creators” जैसी स्टोरी शेयर करें। 4️⃣ फेसबुक ग्रुप्स + Reddit (अनदेखा न करें) वीडियो एडिटिंग कम्युनिटी और जॉब ग्रुप्स “Freelancer India”, “Video Editors Wanted”, “Content Creator Hiring” जैसे ग्रुप्स में हर दिन नए प्रोजेक्ट पोस्ट होते हैं। Reddit पर r/forhire, r/videoediting, r/freelance में “offering” टैग से अपनी सेवा दें। ग्रुप्स में केवल लिंक न डालें, पहले वैल्यू दें – एडिटिंग टिप्स शेयर करें, फिर सेल्स पिच करें। Reddit पर “I will edit your short video for FREE portfolio building” से शुरू करें – फिर पेड प्रोजेक्ट्स। 5️⃣ कोल्ड ईमेलिंग (सबसे अनदेखा पावरफुल तरीका) सीधा टार्गेट करें छोटे YouTubers / पॉडकास्टर्स उन चैनल्स को ईमेल भेजें जिनकी एडिटिंग कमजोर है। उनके 2-3 वीडियो देखें और बताएं कि आप कैसे इंप्रूव कर सकते हैं। आपकी एडिटिंग स्किल्स जितनी शार्प होंगी, क्लाइंट्स उतने ही प्रभावित होंगे। अपनी स्किल्स को निखारने के लिए शुरुआती वीडियो एडिटिंग टिप्स एंड ट्रिक्स जरूर पढ़ें — ये आपके काम में चार चाँद लगा देंगी। स्क्रिप्ट उदाहरण: “आपकी कंटेंट बहुत अच्छी है, लेकिन एडिटिंग को और इंगेजिंग बनाया जा सकता है। मैंने आपको एक डेमो एडिट भेजा है (30 सेकंड क्लिप)। अगर पसंद आए तो हफ्ते के ₹2000 में पूरा वीडियो एडिट कर सकता हूँ।” 6️⃣ रेफरल और वर्ड-ऑफ-माउथ – पुराने क्लाइंट्स से बिज़नेस बूस्ट करें हर क्लाइंट से रेफरल मांगें एक खुश क्लाइंट आपको 5 नए क्लाइंट्स दे सकता है। प्रोजेक्ट खत्म होने के बाद डिस्काउंट के बदले रेफरल मांगें – “अगर आप किसी और को रेकमेंड करोगे तो अगला एडिट 20% ऑफ” व्हाट्सएप या टेलीग्राम पर “क्लाइंट ग्रुप” बनाएं और नियमित अपडेट दें। केस स्टडी बनाएं: पहले और बाद के स्क्रीनशॉट शेयर करें। 7️⃣ पोर्टफोलियो वेबसाइट + लोकल SEO (गोल्डन टिप) एक सिंपल वेबसाइट बनाएं (Google पर रैंक पाएं) Google Sites, कार्ड या वर्डप्रेस की मदद से 2 पेज की वेबसाइट बनाएं और कीवर्ड “वीडियो एडिटर देहरादून” या “फ्रीलांस वीडियो एडिटर भारत” टार्गेट करें। जो लोग सर्च करते हैं वो कन्वर्ट होते हैं। अपने पोर्टफोलियो को शानदार बनाने के लिए Master the Johnny Harris Style: Newspaper Animation in After Effects ट्यूटोरियल जरूर देखें — यह स्टाइल आपके काम को प्रोफेशनल और हाई-वैल्यू बनाएगी। वर्किंग ट्रिक: Google My Business प्रोफाइल बनाएं (फ्री में) और “वीडियो एडिटिंग सर्विस नियर मी” में दिखें। लोकल बिजनेस एडिटिंग क्लाइंट का सोना है। 8️⃣ Discord और स्लैक कम्युनिटी – अनदेखा गोल्ड माइन Creator’s Discord & Filmmaker ग्रुप्स बहुत सारे YouTube क्रिएटर, पॉडकास्टर और गेमिंग कम्युनिटी में डिस्कॉर्ड पर “वीडियो-सर्विसेज” चैनल होते हैं। वहाँ अपना काम दिखाएं। स्लैक ग्रुप्स जैसे “Video Editing Slackers” भी कमाल हैं। बोनस: वीडियो एडिटर के लिए हैक्स 🧨 ✔️ निच-डाउन अप्रोच: सिर्फ जनरल एडिटर मत बनिए – फ़ाइनेंस यूट्यूबर, रियल एस्टेट एजेंट्स, पॉडकास्टर्स के लिए अलग पैकेज बनाएं। ✔️ फ्री डेमो पॉलिसी: 30 सेकंड की एडिटिंग फ्री करके दें, 80% क्लाइंट्स कन्वर्ट होते हैं। ✔️ अपने सोशल प्रूफ बनाएं: testimonials को हाइलाइट करें। “X ने मेरी एडिटिंग से 100k व्यूज पाए”। ✔️ ट्रेंडिंग टूल्स का अपडेट रखें: Adobe After Effects 26.0 के साथ आए Parametric 3D Meshes, Substance Materials और Variable Fonts जैसे नए फीचर्स सीखकर अपने क्लाइंट्स को हैरान कर दें। ⚡ असरदार माइंडसेट: क्लाइंट कैसे ढूंढे इससे ज्यादा जरूरी है – ‘वैल्यू क्रिएट करना’ प्रैक्टिकल एक्सपेरिमेंट: प्रतिदिन 5 लोगों को क्वालिटी मैसेज भेजिए। 30 दिन में 150 लोगों तक पहुंचिए। 10% रिस्पॉन्स रेट से 15 क्लाइंट्स मिल सकते हैं। यह एक नंबर का रूल है जो काम करता है। साथ ही अपनी स्किल्स को लगातार अपग्रेड करें – जितना बेहतर एडिटिंग, उतनी प्रीमियम फीस। आज से ही अपना एक्शन प्लान बनाइए। 85% सक्सेसफुल फ्रीलांस वीडियो एडिटर्स ने अपना पहला क्लाइंट LinkedIn या इंस्टाग्राम रील्स से पाया। 📚 स्रोत (Sources) – और गहराई से सीखने के लिए इस गाइड को लिखने में हमने नीचे दिए गए संसाधनों से मदद ली है। ये लिंक्स आपको एडिटिंग स्किल्स और टूल्स पर विस्तृत जानकारी देंगे, जिससे आप अपने क्लाइंट्स को और बेहतर सर्विस दे सकते हैं: Mastering Video Editing: Essential
After Effects 26.0 January 2026 Update: नई Features का Complete Guide | AE Review
After Effects 26.0 January 2026 Update: नई Features का Complete Guide | AE Review AE Review After Effects 26.0 January 2026 Release Adobe After Effects 26.0: सभी नई Features का Complete Guide 3D Meshes से लेकर Variable Fonts तक — After Effects का यह update motion graphics और VFX workflows को पूरी तरह बदल देता है। January 2026 — April 2026 Updated 12 min read After Effects, Motion Graphics, VFX Adobe ने January 2026 में After Effects Version 26.0 release किया है, और यह update सच में game-changing है। इस release में 3D workflow, typography, और playback performance — तीनों areas में बड़े improvements किए गए हैं। अगर आप motion graphics designer, VFX artist, या video editor हैं, तो यह article आपके लिए है। इसमें हम हर नए feature को detail से समझेंगे — क्या है, कैसे काम करता है, और आपके workflow में यह कैसे helpful होगा। 📋 Table of Contents After Effects 26.0 — Overview Parametric 3D Meshes Substance 3D Materials (SBSAR) Variable Font Support Native SVG Import Unmult Effect Lossless Compressed Caching Workflow Improvements पुराने vs नए Version Comparison Pro Tips & Recommendations Conclusion CURRENT STABLE RELEASE 26.0 After Effects January 2026 Focus: 3D Workflows · Typography · Playback Efficiency 01 After Effects 26.0 — Overview After Effects 26.0 Adobe के Creative Cloud ecosystem का एक major release है। इस update में कुल 6 नए core features और कई workflow improvements हैं। Adobe का focus इस बार clearly 3D capabilities को democratize करना था — यानी complex 3D work को बिना Cinema 4D या Blender के possible बनाना। After Effects 26.0 — New 3D workflow interface 🧊 Parametric 3D Meshes Native 3D shapes directly in AE — no plugins needed 🎨 Substance Materials Procedural SBSAR materials import with animation support 🔤 Variable Fonts OpenType Variable font sliders with custom keyframes 📐 Native SVG Import SVGs as editable shape layers — gradients preserved ✂️ Unmult Effect GPU-accelerated background removal with HDR support 💾 Lossless Caching 4x less disk space for preview frames — same quality 02 Parametric 3D Meshes यह शायद After Effects 26.0 का सबसे exciting feature है। अब आप directly After Effects में native 3D primitive shapes create कर सकते हैं — बिना किसी third-party plugin या 3D software के। Feature Detail Available 3D Primitives After Effects 26.0 में ये 3D shapes natively available हैं: ⬛ Cube — customizable size और bevel के साथ 🔵 Sphere — radial slicing controls के साथ 🔺 Cone — height और base radius adjustable 🟫 Cylinder — segment count control 🍩 Torus — inner/outer radius parameters 🔷 Plane — grid resolution adjustable Parametric 3D Meshes — Non-destructive 3D primitives in AE Key Benefit: ये meshes non-destructive हैं — मतलब आप कभी भी किसी भी property को बदल सकते हैं। Size, bevel, radial slicing — सब कुछ properties panel से control होता है और fully animatable है। Workflow में कैसे Use करें? Layer menu → New → 3D Mesh पर जाएं और अपना desired shape select करें। Shape add होने के बाद, Properties panel में आपको सभी parametric controls मिलेंगे। इन्हें Composition की 3D space में freely position, rotate, और scale किया जा सकता है। 03 Substance 3D Materials (SBSAR) Adobe का Substance 3D ecosystem अब After Effects के साथ directly integrate हो गया है। आप SBSAR format के Substance materials को directly AE में import करके 3D layers और meshes पर apply कर सकते हैं। Materials System Substance Materials की Capabilities Substance materials procedural होती हैं — इसका मतलब है कि material के parameters (जैसे roughness, metalness, surface wear) को animate किया जा सकता है। उदाहरण के लिए: 🦾 Metal surface का rust gradually बढ़ता दिखाना over time 💧 Stone material पर wetness animate करना ✨ Surface wear और tear को keyframe करना 🎨 Material color और pattern को expressions से dynamically drive करना Substance 3D Material — Procedural material applied to 3D mesh in AE Free Substance Materials कहाँ मिलेंगे? Adobe Substance 3D Assets library पर हजारों free और premium materials available हैं। Creative Cloud subscription के साथ monthly material downloads भी मिलते हैं। Adobe Substance 3D community से भी user-created materials download किए जा सकते हैं। 04 Variable Font Support Typography lovers के लिए यह एक बड़ा update है। After Effects 26.0 अब OpenType Variable Fonts को natively support करता है। Typography Variable Font Properties जो Animate हो सकती हैं W Weight — thin से ultra-bold तक smooth transition ↔ Width — condensed से expanded तक animate करें ∠ Slant/Italic — upright से italic के बीच morph करें 📏 Custom Axes — font-specific axes जैसे optical size, grade Variable Font Support — Character panel में sliders से weight और width animate करें Character Panel में कैसे Access करें? कोई भी variable font select करने पर Character panel में automatically variable font sliders appear होंगे। इन sliders को standard keyframes से animate किया जा सकता है या expressions से drive किया जा सकता है। Popular variable fonts जैसे Inter, Roboto Flex, Recursive आदि Google Fonts पर free में available हैं। Pro Tip: Variable fonts के साथ expressions use करें जैसे wiggle(2, 50) weight property पर apply करने से font का weight randomly oscillate करता है — एक unique glitch effect के लिए। 05 Native SVG Import Designers के लिए यह एक long-awaited feature है। अब आप SVG files को directly After Effects में import कर सकते हैं — और वे automatically editable shape layers में convert हो जाती हैं। Design Workflow SVG Import क्या Preserve करता है? 🔷 Vector Paths — सभी shapes और curves perfectly preserve होते हैं 🌈 Gradients — linear और radial gradients animatable रहते हैं 🫙 Transparency — opacity और blend modes maintain होते हैं 📁 Layer Structure — SVG groups AE layers में convert होते हैं Native SVG Import — Figma/Illustrator से SVG directly AE में editable shape layers के रूप में Figma/Illustrator Workflow अब workflow बहुत simple हो गया है: Figma या Illustrator में design करें → SVG export करें → After Effects में drag & drop करें। SVG automatically editable shape
5 Best Gaming Headphones Under ₹5000 India 2026 🎧 | Gaming + Video Editing Review Hindi

5 Best Gaming & Video Editing Headphones Under ₹5000 India 2026 | Honest Review 🎧 Affiliate Review · 2026 · Hindi 5 Best Gaming & Video EditingHeadphones Under ₹5000India 2026 — Honest Review EvoFox Hyperion, HAMMER Blaze, GOBOULT Mustang Q, Zebronics, aur HyperX Cloud Stinger 2 Core — kaun sa best hai? Puri jaankari Hindi mein. 📅 April 2026 · ⏱ 10 min read · 🇮🇳 India Prices · 🎮 Gaming + 🎬 Editing Shuruat Sahi Headphone choose karna kyun zaroori hai? Gaming ho ya video editing — audio quality ka seedha asar aapke kaam aur experience par padta hai. BGMI mein enemy ke footsteps sunna ho, ya DaVinci Resolve mein audio mix karna — ek accha headphone sab kuch badal deta hai. Market mein hazaaron options hain, lekin ₹5,000 ke andar India mein kaunse 5 headphones actually worth it hain? Hamne 5 best options research kiye hain — real specs, actual user reviews, aur India pricing ke saath. Har product ke saath direct Amazon affiliate link diya gaya hai taaki aap seedha check kar sakein. ⚠️ Disclosure: Is article mein Amazon affiliate links hain. Agar aap inse khareedte hain to hume thoda commission milta hai — aapko koi extra charge nahi lagta. Product #1 1 EvoFox (Amkette) EvoFox Hyperion Gaming Headphones Gaming Video Editing 7.1 Surround Best Value EvoFox — Amkette ki gaming division — ne Hyperion Series ke saath ek kamaal ka product launch kiya hai. 50mm drivers, retractable mic, aur 7.1 virtual surround sound — yeh sab ek budget-friendly price mein. Gaming aur video editing dono ke liye perfect choice. 3.5mm + USB-C dual connectivity ka matlab hai yeh PC, console, aur mobile — sab par chalega. Swappable ear pads ek rare feature hai is price range mein. Driver Size 50mm Connectivity 3.5mm + USB-C Surround Virtual 7.1 Mic Type Retractable Cable 2m Braided Platform PC/Console/Mobile Performance Scores Sound Quality 8.5/10 Mic Quality 8.2/10 Comfort 8.8/10 Build Quality 8.0/10 Value for Money 9.5/10 ✓ Kya Achha Laga 50mm drivers — bass bahut accha Retractable mic — convenient Swappable ear pads — unique feature Dual connectivity — 3.5mm + USB-C 2m braided cable — durable Inline controls — handy ✗ Kya Thoda Kam Laga Build quality plastic-heavy Kuch users ne mic issue report kiya Software sirf Windows par RGB nahi hai is model mein 🏆 Best For: Video editing + gaming dono use karne wale. Budget mein best features. Proxy editing aur timeline work ke liye perfect headphone. ₹1,849 MRP ₹2,899 ✓ 36% OFF — Amazon par Amazon par Khareedein Product #2 2 HAMMER HAMMER Blaze Wired Gaming Headphones Gaming RGB Lights 7.1 Stereo Budget Pick HAMMER Blaze ek RGB lover gamer ka dream headphone hai. Eye-catching RGB lights, 50mm neodymium drivers, aur 7.1 stereo surround sound — yeh sab ek premium-looking package mein. BGMI aur Valorant players ke liye especially recommended. Windows, Xbox, aur PlayStation — sab platform par compatible. Omnidirectional mic se communication crystal clear rehti hai multiplayer gaming mein. Driver Size 50mm Connectivity USB 2.0 Surround 7.1 Stereo Mic Type Omnidirectional Cable Length 1.5m Weight 330g Performance Scores Sound Quality 7.8/10 RGB Looks 9.5/10 Mic Quality 8.0/10 Comfort 8.2/10 Value for Money 8.8/10 ✓ Kya Achha Laga RGB lights — bahut attractive 50mm drivers — deep bass PC + Xbox + PlayStation support Breathable ear cushions Adjustable headband Gaming ke liye tuned audio ✗ Kya Thoda Kam Laga Cable thodi chhoti (1.5m) Video editing ke liye average USB only — 3.5mm nahi Non-detachable cable 🎮 Best For: Pure gamers jo RGB chahte hain. BGMI, Valorant, COD ke liye best. Footsteps clearly sunai dete hain. ₹1,599 MRP ₹8,999 ✓ 82% OFF — Amazon par Amazon par Khareedein Product #3 3 GOBOULT GOBOULT X Mustang Q Gaming Headphone Gaming LED Lights Ultra Budget GOBOULT Mustang Q un logon ke liye hai jo sabse kam budget mein gaming headphone chahte hain. Yeh entry-level headphone gaming ke basics ko cover karta hai — decent sound, mic, aur eye-catching design. Beginner gamers ke liye aur students ke liye yeh ek practical choice hai. Gaming ka taste lene ke liye pehla headphone ke roop mein perfect. Type Wired Gaming Connectivity USB / 3.5mm Lights LED Mic Built-in Target Beginners Platform PC/Laptop Performance Scores Sound Quality 7.0/10 Mic Quality 6.8/10 Build Quality 6.5/10 Comfort 7.2/10 Value for Money 8.5/10 ✓ Kya Achha Laga Bahut affordable price Beginner gamers ke liye perfect LED design — attractive look Basic gaming needs cover karta hai ✗ Kya Thoda Kam Laga Premium feel nahi hai Competitive gaming ke liye average Video editing ke liye suitable nahi Long sessions mein comfort average 💡 Best For: Pehla gaming headphone lene wale beginners. Agar budget bilkul tight hai to yeh choose karein. Check Price ✓ Amazon par best deal Amazon par Khareedein Product #4 4 ZEBRONICS Zebronics Gaming Headphone Gaming Editing Trusted Brand Zebronics India ki sabse trusted gaming peripherals brand hai. Inka gaming headphone reliability aur after-sales service ke liye popular hai. India mein har sheher mein service centers available hain — yeh ek badi advantage hai. Decent audio quality, comfortable design, aur affordable price — Zebronics ka combination Indian market ke liye perfect hai. Gamers aur basic video editing dono ke liye usable. Brand Origin India Service Pan India Connectivity USB / 3.5mm Mic Built-in Warranty 1 Year Platform PC/Laptop Performance Scores Sound Quality 7.5/10 Build Quality 8.0/10 After Sales 9.2/10 Comfort 7.8/10 Value for Money 8.5/10 ✓ Kya Achha Laga India mein service centers Trusted brand — 20+ saal Reliable build quality Good value for money Wide availability in India ✗ Kya Thoda Kam Laga Audio tuning basic hai Design old-school lagta hai Competition se peeche features mein Premium feel nahi 🛡️ Best For: Jinhe brand reliability aur service important hai. Students aur office workers ke liye bhi suitable. Check Price ✓ Amazon par best deal Amazon par Khareedein Product #5 — Premium Pick 5 HyperX (HP) HyperX Cloud Stinger 2 Core Gaming Video Editing Premium Brand DTS Audio HyperX Cloud Stinger 2 Core is
Ramayana Teaser Review Hindi: Ranbir Kapoor का Ram Look कैसा है? Full Analysis 2026
Ramayana Teaser Review: Ranbir Kapoor as Lord Rama — Goosebumps या Disappointment? | 2026 ॥ रामो विग्रहवान् धर्मः ॥ Teaser Review Bollywood 2026 Cinematic Epic Hindi Analysis Ramayana Teaser Review — Ranbir Kapoor का Lord Rama Goosebumps या Disappointment? ⭐ 7.5 / 10 — Promising लेकिन Mixed Feelings ₹4,000 करोड़ की India की सबसे महंगी film का teaser आ गया। Hans Zimmer + AR Rahman का music, Oscar-winning DNEG के VFX, और Ranbir Kapoor as Lord Rama — लेकिन क्या यह सब deliver किया? 📅 April 3, 2026 · ⏱ 12 मिनट पढ़ें · 🎬 Teaser: 2 मिनट 38 सेकंड · 🗓 Diwali 2026 Release पहली बात जब Teaser आया — तो India रुक गया 2 April 2026। Hanuman Jayanti का पवित्र दिन। और इसी दिन Namit Malhotra ने अपने birthday पर India को एक gift दिया — Ramayana का पहला teaser, जिसका नाम है “Rama”। सिर्फ 2 मिनट 38 सेकंड। लेकिन इन 158 seconds ने पूरे internet को दो हिस्सों में बाँट दिया। एक तरफ वो लोग जो “jai shree ram” लिख रहे थे, दूसरी तरफ वो जो “Adipurush 2.0” का tag लगा रहे थे। Los Angeles और New York में special screenings हुईं। Nitesh Tiwari शांत थे, Namit Malhotra nervous। Press conference viral हुई। और फिर जब teaser officially drop हुआ — 24 घंटे में 1.3 करोड़ से ज्यादा views। “Whenever the world descends into chaos, He is always the answer.” — यही line थी जिससे Ramayana teaser शुरू होता है। और यही line इस film का promise है। हम एक professional cinematic blogger की नजर से इस teaser को analyze करेंगे। न सिर्फ fan की तरह, न सिर्फ critic की तरह — बल्कि एक ऐसे viewer की तरह जो Indian cinema से प्यार करता है और उसकी असली potential को समझता है। Film की जानकारी Ramayana 2026 — Complete Film Details ₹4,000 Cr Total Budget (2 Parts) Nov 7 2026 Diwali Release 2:38 Teaser Runtime 8× Oscar DNEG VFX Studio IMAX Global Release Format Part 2 Diwali 2027 Cast — कौन है कौन? 🏹 Ranbir Kapoor Lord Rama Maryada Purushottam — duty, sacrifice, और righteousness का प्रतीक 👸 Sai Pallavi Sita Mata South की powerhouse actress — emotional depth guarantee 👑 Yash Ravana KGF star — villain में superstar energy, co-producer भी 🙏 Sunny Deol Lord Hanuman Physical presence और devotion — perfect casting ⚔️ Ravi Dubey Lakshman Rama के छोटे भाई — loyalty और valour का किरदार 🎬 Nitesh Tiwari Director Dangal, Chhichhore fame — emotional storytelling master 🎵 Music: Hans Zimmer (Dune, Inception, Interstellar) और AR Rahman मिलकर Ramayana का score बना रहे हैं। यह Zimmer का Indian cinema में पहला project है। Teaser के background score ने already goosebumps दे दिए। The Main Event Ranbir Kapoor as Lord Rama — हमारा Honest Verdict यह casting announcement जब हुई थी, तब बहुत controversy हुई थी। Ranbir Kapoor — जो Rockstar, Barfi, Sanju जैसे किरदार जीते हैं — वो Lord Rama बनेंगे? लेकिन director Nitesh Tiwari का जवाब था: “There was nobody better than Ranbir Kapoor to portray all these things and manage the expectations of a billion people.” और teaser देखने के बाद — वो partially सही साबित हुए। Ranbir का पहला glimpse — royal gold jewelry, elaborate costume, bow in hand — genuinely majestic है। उनकी आँखों में एक calm authority है। Coronation scene हो या forest exile — physically वो LORD RAMA जैसे दिखते हैं। 🔥 LA Screening Reaction: जब Ranbir की Rama entry boat पर हुई, audience went completely silent। फिर एक viewer ने लिखा — “pure goosebumps moment” और “that silhouette shot is pure cinema.” लेकिन एक section के लिए — Ranbir “mid” लगे। उनके चेहरे पर वो divine innocence जो Ramanand Sagar के Arun Govil में थी, वो नहीं दिखी। Ranbir एक warrior-king की तरह दिखते हैं — लेकिन एक पवित्र, सात्विक भगवान की तरह? That’s debatable। Ranbir ने खुद कहा: “My Dharma is to do my job.” और teaser में उनकी physical transformation impressive है। पर full film में emotional depth कितनी है — वो तो November में पता चलेगा। Physical Look 9 / 10 Screen Presence 8 / 10 Divinity Factor 6.5 / 10 Emotional Depth (Teaser) 7 / 10 Technical Analysis VFX — Oscar-Winning DNEG ने क्या किया? Ramayana के VFX की जिम्मेदारी DNEG को दी गई है — वही studio जिसने Inception, Interstellar, और Dune के visual effects बनाए। 8 Oscar जीते हैं इस studio ने। Teaser में Ayodhya की grand architecture, divine beings, battle sequences, और mythological creatures दिखाए गए हैं। और honestly — कुछ shots genuinely breathtaking हैं। 🎨 जो अच्छा दिखा: Ayodhya का scale, Rama का boat silhouette shot, coronation sequence, और background में divine light effects — ये सब world-class VFX हैं। IMAX में देखने पर experience और magnificent होगा। ⚠️ जो खटका: कुछ shots में CGI थोड़ा heavy-handed लगा। एक Reddit user ने लिखा — “shots look AI enhanced or something” और Adipurush comparison तुरंत आया। हालांकि यह final product नहीं है — VFX work अभी भी progress में है। Important point: यह एक teaser है, final film नहीं। VFX teams अक्सर release से महीनों पहले तक काम करती हैं। जो Dune में हुआ — final cut में VFX बिल्कुल अलग था early test footage से। Ramayana के साथ भी यही expect करें। Grand Scale 8.8 / 10 Consistency 6.8 / 10 World Building 8.5 / 10 Adipurush से बेहतर? हाँ — 9 / 10 Sound & Score Hans Zimmer + AR Rahman — Music का Magic यह collaboration Indian cinema history में unprecedented है। Hans Zimmer — जिनका Interstellar score आपको space में ले जाता है, जिनका Dune score आपको arrakis की रेत में खड़ा कर देता है — वो पहली बार Indian cinema के लिए compose कर रहे हैं। और उनके साथ हैं AR Rahman — जिन्होंने Roja से Slumdog Millionaire तक, Dil Se से Lagaan तक — हर genre में magic किया है। Teaser का background score — एक haunting, epic, spiritual quality वाला — already viewers को goosebumps दे रहा है। यह teaser का सबसे strong
₹50,000 मेंVideo Editing Setupकैसे बनाएं?
₹50,000 में Video Editing Setup कैसे बनाएं 2026 | Complete Budget Guide Hindi Budget Guide · 2026 · Hindi ₹50,000 मेंVideo Editing Setupकैसे बनाएं? PC से लेकर monitor, microphone, और software तक — हर चीज़ की complete list। Beginners और YouTubers दोनों के लिए perfect। 📅 2026 Updated ⏱ 10 मिनट पढ़ें 🇮🇳 India Prices 🎯 Beginners के लिए शुरुआत क्या ₹50,000 में सच में editing setup बन सकता है? यह सवाल हर beginner YouTuber और video editor के मन में आता है। जब आप बड़े creators के setup देखते हैं — ₹2-3 लाख के PC, ₹50,000 के monitors — तो लगता है कि editing शुरू करना बहुत महंगा है। लेकिन सच यह है: ₹50,000 में एक solid, professional-quality editing setup बिल्कुल possible है। India में parts की कीमतें globally compare करें तो काफी competitive हैं। सही planning से आप 1080p editing smoothly कर सकते हैं, और basic 4K भी handle हो जाती है। इस guide में हमने हर component को carefully research किया है — India के current prices के हिसाब से। हर option में आपको budget और recommended choice दोनों मिलेंगे। “Setup कितना महंगा है — यह matter नहीं करता। Matter यह करता है कि आप उस setup से क्या बना रहे हो।” Budget Breakdown ₹50,000 कहाँ-कहाँ खर्च होंगे? पहले एक overview — फिर हर component को detail में समझेंगे। ⚙️ CPU + Motherboard ₹12,000 Ryzen 5 5600 combo 🧠 RAM ₹5,000 16GB DDR4 3200MHz 🖥️ GPU ₹12,000 GTX 1660 / RX 6600 💾 Storage ₹3,500 512GB NVMe SSD 📺 Monitor ₹8,000 24″ Full HD IPS 🎤 Mic + Audio ₹3,000 USB Condenser Mic 🖱️ Cabinet + PSU + Others ₹4,500 Cabinet, PSU, KB+Mouse 💻 Software FREE DaVinci Resolve Component Item Price (₹) CPU + Motherboard Ryzen 5 5600 + B450M ₹12,000 RAM 16GB DDR4 3200MHz (2×8GB) ₹5,000 GPU GTX 1660 Super 6GB ₹12,000 Storage 512GB NVMe SSD + 1TB HDD ₹3,500 Monitor 24″ FHD IPS Panel ₹8,000 Mic USB Condenser Mic ₹2,000 Cabinet + PSU Mid Tower + 600W PSU ₹3,500 KB + Mouse + Others Basic Combo Set ₹1,000 🏆 Total Budget ~₹47,000 ✅ ₹3,000 का buffer बचाकर रखें — assembly, thermal paste, या future upgrade के लिए। Software (DaVinci Resolve) पूरी तरह FREE है। Component 01 ⚙️ CPU — प्रोसेसर Editing का दिल — सही CPU से rendering fast होती है Video editing में CPU सबसे important component है। यह timeline playback, export speed, और effects rendering — सब handle करता है। Budget में Ryzen 5 series best value देती है। Intel vs AMD की बात करें — AMD Ryzen इस budget में ज्यादा cores देता है। ज्यादा cores = faster export। Ryzen 5 5500 ~₹9,000 6 Cores / 12 Threads 3.6GHz Base | 4.2GHz Boost B450 Motherboard के साथ Budget pick — good value Best Value Ryzen 5 5600 ~₹12,000 6 Cores / 12 Threads 3.7GHz Base | 4.6GHz Boost B450/B550 Motherboard Highly recommended choice 💡 Pro Tip: CPU+Motherboard combo खरीदें — अलग-अलग खरीदने से ₹500-1,000 ज्यादा लगते हैं। Local shops पर combo deals मिलती हैं। Component 02 🧠 RAM — मेमोरी जितनी ज्यादा RAM — उतना smooth editing experience Video editing में RAM बहुत crucial है। DaVinci Resolve और After Effects दोनों RAM-hungry हैं। 16GB minimum है, 32GB ideal। लेकिन budget में 16GB से शुरू करें और बाद में upgrade करें। DDR4 3200MHz speed ले — यह Ryzen CPUs के साथ best performance देती है। Single stick की बजाय 2×8GB dual channel configuration लें। Recommended 16GB DDR4 (2×8GB) ~₹3,500–5,000 Kingston Fury / Corsair Vengeance 3200MHz speed Dual Channel — more performance Upgrade to 32GB later 8GB DDR4 (1×8GB) ~₹2,000 बहुत tight budget के लिए Laggy experience आएगा जल्द upgrade जरूरी Not recommended for editing ⚠️ 8GB RAM avoid करें — After Effects तो बिल्कुल चलेगा नहीं। DaVinci Resolve भी बहुत slow होगा। 16GB minimum है। Component 03 🖥️ GPU — Graphics Card DaVinci Resolve के लिए सबसे जरूरी component अगर आप DaVinci Resolve use करते हैं — GPU सबसे important component है। Color grading, effects, और GPU-accelerated rendering सब GPU पर depend करता है। Minimum 4GB VRAM चाहिए, 6GB+ better। NVIDIA cards CUDA support की वजह से After Effects में better perform करते हैं। AMD cards DaVinci Resolve में भी अच्छा करते हैं। Best Pick GTX 1660 Super ~₹10,000–12,000 6GB GDDR6 VRAM CUDA support — AE & DaVinci 1080p editing — very smooth Used market में ₹7,000–9,000 AMD RX 6600 ~₹11,000–13,000 8GB GDDR6 VRAM DaVinci Resolve में excellent After Effects में limited ज्यादा VRAM — future proof 🔥 Budget Tip: Used/second-hand GPU market check करें। GTX 1660 Super used में ₹7,000–8,000 में मिलती है — same performance, less price। ✓ NVIDIA क्यों? CUDA — After Effects support DaVinci Resolve में fast Stable drivers Better software support ✗ क्या miss होगा? AMD से कम VRAM same price Ray tracing basic है Older architecture (GTX) Gaming में थोड़ा behind Component 04 💾 Storage — स्टोरेज Fast SSD से editing lag-free होती है Video files बहुत large होती हैं। HDD पर editing करने से software lag करता है, timeline jerky होती है। OS और software के लिए SSD जरूरी है। Media files HDD पर रख सकते हैं। Ideal setup: 512GB NVMe SSD (OS + software + active projects) + 1TB HDD (old footage archive)। Recommended 512GB NVMe SSD ~₹2,500 Kingston NV2 / WD Blue SN570 2,400 MB/s read speed OS + Software + Projects M.2 slot में install होती है 1TB HDD (Additional) ~₹2,000–2,500 Seagate Barracuda 7200RPM Old footage archive Rendered files storage Long-term storage के लिए Component 05 📺 Monitor — स्क्रीन Color accurate monitor से editing professional बनती है Video editing के लिए monitor में IPS panel जरूरी है — accurate colors और wide viewing angles। TN panels में color shift होता है जो editing में problem करता है। सबसे important: sRGB color coverage 90%+ होना चाहिए। Resolution 1920×1080 (Full HD) minimum — 2K बेहतर रहती है अगर budget allow करे। Best Value LG 24MP60G / AOC 24B2XH ₹7,000–9,000 24″ Full HD (1920×1080) IPS Panel — accurate colors 75Hz refresh rate sRGB 99%
Kling 3 vs Runway Gen-4.5 (2026): कौन सा AI Video Tool वाकई Viral Shorts और Cinematic B-Roll के लिए Best है?
Kling 3 vs Runway Gen-4.5 2026: कौन सा AI Video Tool Best है? | IFM Learn 🔥 IFM Learn Blog · AI Tools · March 2026 IFM Learn ← सभी Articles 🤖 AI Video Tools · Comparison Kling 3 vs Runway Gen-4.5 (2026): कौन सा AI Video Tool वाकई Viral Shorts और Cinematic B-Roll के लिए Best है? IFM IFM Learn Team 25 मार्च 2026 · AI Tools ⏱ 8 min read ⚡ Kling 3.0 4K · Native Audio · 15sec · Physics VS 🎬 Runway Gen-4.5 Fast · Character Consistent · VFX March 2026 · Real Test Comparison · IFM Learn 2026 में AI video creation अब सिर्फ experiment नहीं रहा — यह रोज़ का काम बन चुका है। हर YouTube creator, freelancer, और brand अब AI से video बना रहा है। और इस वक्त दो tools सबसे ज़्यादा चर्चा में हैं: Kling 3.0 और Runway Gen-4.5। दोनों बेहद powerful हैं — लेकिन दोनों अलग-अलग काम के लिए बने हैं। इस article में हमने दोनों को real workflow में test किया और बताया कि आपके लिए — Shorts creator, B-roll filmmaker, या brand marketer — कौन सा सही है। “गलत tool choose करना मतलब घंटों बर्बाद करना। सही tool मतलब एक दिन में पूरी week का content।” 🔍 पहले जानो: दोनों Tools क्या हैं? ⚡ Kling 3.0 Kling को Kuaishou Technology ने बनाया है — वही company जिसने TikTok के competitor Kwai बनाया। Kling 3.0 आज image-to-video, lip-sync, spatial audio, और 4K/60fps generation में industry का सबसे strong tool है। एक generation में 6 camera cuts — यानी पूरी edited sequence AI खुद बनाता है। 🎬 Runway Gen-4.5 Runway 2018 से AI video का pioneer है। Super Bowl commercials, Hollywood indie films — सब जगह Runway का use होता है। Gen-4.5 में character consistency reference system, ultra-fast turbo mode, और VFX-style aesthetic है जो professional filmmakers को पसंद है। 💡 Key Insight Kling photorealism के लिए बना है — real-world physics, actual sound। Runway cinematic storytelling के लिए बना है — character consistency, creative style, speed। ⚔️ Feature-by-Feature Comparison Feature ⚡ Kling 3.0 🎬 Runway Gen-4.5 Max Resolution 4K Native / 60fps Best 1080p / 30fps Clip Length 15 seconds Longer Max 10 seconds Built-in Audio ✅ Lip-sync + Spatial Audio Best ✅ Text-to-Speech Generation Speed 3–6 minutes 30–90 seconds ⚡ Fastest Character Consistency ❌ हर generation अलग ✅ Gen-4 References Best Physics / Realism पानी, कपड़ा, बाल — photorealistic Best Smooth, AI-look Image-to-Video Industry best Best अच्छा, consistent Video-to-Video ❌ नहीं ✅ Act Two Feature Winner Multi-shot Storyboard ✅ एक prompt में 6 cuts Unique ❌ एक-एक clip Free Plan 66 credits/day (रोज़) Better One-time trial only Starting Price $6.99/month Cheaper $12/month 🔄 Viral Shorts बनाने का Step-by-Step Workflow अकेले एक tool use करना ठीक है — लेकिन दोनों को combine करना सबसे powerful strategy है। यह वो workflow है जो top AI creators March 2026 में follow कर रहे हैं: 🔄 Script → Kling → Runway → CapCut → Publish 5-Step Pro Workflow for Viral AI Shorts 2026 1 ✍️ Script लिखो — ChatGPT / Claude से 30-60 second script तैयार करो। पहले 3 seconds में hook डालो। हर scene के लिए visual prompt भी note करो — जैसे “धूप में एक महिला पहाड़ पर चल रही है, slow motion, cinematic।” 2 ⚡ Kling से B-roll और Action Shots बनाओ Product visuals, nature scenes, physics-heavy shots, lip-sync content — Kling के multi-shot storyboard से एक ही prompt में पूरी sequence मिलती है। Spatial audio automatically sync होता है। 3 🎬 Runway से Character Shots और Hero Moments लो Brand videos, consistent protagonist shots, VFX-style moments — Gen-4 References feature से एक character को हर scene में same रखो। Turbo mode से quickly iterate करो। 4 🎵 CapCut में Final Edit करो सारे clips import करो। Trending audio लगाओ, captions add करो, color grade करो, transitions smooth करो। 9:16 format में export करो Reels/Shorts के लिए। 5 🚀 Post करो और Analytics देखो YouTube Shorts, Instagram Reels, TikTok पर upload। देखो कौन सा AI clip ज़्यादा engage हुआ — अगले video में वो style ज़्यादा use करो। 💰 Pricing 2026 — कितना खर्च आएगा? Plan ⚡ Kling 3.0 🎬 Runway Gen-4.5 Free 66 Credits/Day (रोज़) Trial Credits (एक बार) Standard $6.99/month (~₹580) $12/month (~₹1,000) Pro $21.99/month (~₹1,830) $28/month (~₹2,330) Max / Unlimited $64.99/month $76/month 💡 Budget Tip अगर आप beginner हो — Kling का free plan use करो। रोज़ 66 credits मिलते हैं जो replenish होते हैं। इससे बिना पैसे खर्च किए रोज़ 1-2 videos बना सकते हो। Runway का free trial एक बार ही मिलता है। ✅❌ Pros और Cons ⚡ Kling 3.0 ✓ 4K/60fps native generation ✓ Built-in lip-sync + spatial audio ✓ 15 sec + multi-shot storyboard ✓ Photorealistic physics ✓ Image-to-video में best ✓ Free plan genuinely useful ✗ Generation slow: 3–6 minutes ✗ Character consistency नहीं ✗ Video-to-video नहीं है 🎬 Runway Gen-4.5 ✓ Ultra fast: 30–90 seconds ✓ Character consistency (Gen-4 Ref) ✓ Video-to-video (Act Two) ✓ Professional VFX aesthetic ✓ 30+ AI tools ecosystem ✓ Fast iteration / try & reject ✗ सिर्फ 1080p, 4K नहीं ✗ Max 10 seconds per clip ✗ Free plan बस एक बार 🎯 आपके लिए कौन सा सही है? Kling 3.0 choose करो अगर: आप daily YouTube Shorts या Reels बनाते हो, lip-sync / talking content चाहिए, 4K B-roll चाहिए, budget tight है, या image-to-video animate करना है। Runway Gen-4.5 choose करो अगर: Brand या client work है जहाँ एक character multiple scenes में चाहिए, VFX-style cinematic look चाहिए, fast iteration ज़रूरी है, या video-to-video transformation करनी है। सबसे powerful strategy: दोनों use करो — Kling से realistic shots, Runway से character-consistent scenes, CapCut में सब merge। 🏆 IFM Learn का Final Verdict कोई एक “best” नहीं है। Kling 3.0 wins in realism, audio, और resolution। Runway Gen-4.5 wins in speed, consistency, और creative style। दोनों को एक workflow में combine करना — यही 2026 का असली winning formula है। 🎓 After Effects और AI Tools Hindi में सीखो IFM Learn Academy पर complete
DaVinci Resolve vs After EffectsSystem Requirements 2026
DaVinci Resolve vs After Effects System Requirements 2026 | हिंदी गाइड 📹 2026 COMPLETE GUIDE · हिंदी में DaVinci Resolve vs After Effects System Requirements 2026 कौन सा software आपके PC पर चलेगा? RAM, GPU, CPU की पूरी comparison — सरल हिंदी में। 📅 2026 Updated ⏱ 8 मिनट पढ़ें 🎯 Beginners & Pro दोनों के लिए परिचय क्यों जरूरी है यह जानना? अगर आप video editing या motion graphics सीखना चाहते हैं, तो पहला सवाल यही आता है — DaVinci Resolve चलाऊं या After Effects? लेकिन इससे भी पहले एक जरूरी सवाल है: क्या आपका PC इन्हें handle कर पाएगा? 2026 में दोनों software बहुत powerful हो गए हैं। इनकी system requirements भी बढ़ गई हैं। अगर आपने बिना जाने software install किया और PC hang करने लगा — तो सारी मेहनत बेकार। इस article में हम step-by-step compare करेंगे — minimum requirements, recommended specs, GPU की जरूरत, और low-end PC पर performance। सब कुछ आसान हिंदी में। 💡 “सही software चुनना उतना जरूरी नहीं जितना यह जानना कि आपका PC उसे support करता है या नहीं।” Software परिचय दोनों Software के बारे में जानें 🎬 DaVinci Resolve BY BLACKMAGIC DESIGN यह एक professional video editing और color grading software है। इसमें editing, color correction, visual effects, और audio mixing — सब एक जगह मिलता है। सबसे अच्छी बात: इसका free version बेहद powerful है। ✨ After Effects BY ADOBE SYSTEMS यह motion graphics और visual effects का king माना जाता है। YouTube intros, title animations, और cinematic effects के लिए यह सबसे popular choice है। लेकिन यह subscription-based है — Adobe Creative Cloud का हिस्सा। DaVinci Resolve उन लोगों के लिए best है जो video editing और color grading को seriously लेते हैं। Hollywood films भी इससे बनती हैं। After Effects उन creators के लिए है जो animations, motion graphics, और special effects पर focus करते हैं। YouTubers और advertisers इसे सबसे ज्यादा use करते हैं। Minimum Requirements Minimum System Requirements — 2026 ⚠️ ध्यान दें: Minimum requirements पर software चल तो जाएगा, लेकिन performance average रहेगी। Professional काम के लिए Recommended specs जरूर देखें। Component 🎬 DaVinci Resolve 19 ✨ After Effects 2025 Operating System Windows 10 / macOS 12 / Ubuntu 20.04 Windows 10 (64-bit) / macOS 13 RAM 16 GB 16 GB GPU VRAM 2 GB VRAM 4 GB VRAM CPU Intel Core i7 / AMD Ryzen 7 Intel Core i5 (8th Gen+) / Ryzen 5 Storage 2.5 GB (Software) + Project Space 15 GB (Software) + Project Space Internet Not Required (Free Version) Required (Activation) Display Resolution 1920 × 1080 1920 × 1080 Recommended Requirements Recommended System Requirements — Best Performance ✅ ये specifications आपको smooth, lag-free editing experience देंगी। अगर आप 4K editing करते हैं या complex projects handle करते हैं, तो ये specs जरूरी हैं। 🎬 DaVinci Resolve — Recommended 🧠 RAM 32 GB 4K के लिए 64GB बेहतर 🖥️ GPU VRAM 8–16 GB NVIDIA RTX 3070+ ⚙️ CPU 12-Core+ Ryzen 9 / Core i9 💾 Storage NVMe SSD 1TB+ recommended ✨ After Effects — Recommended 🧠 RAM 32 GB RAM Preview के लिए ज़रूरी 🖥️ GPU VRAM 8 GB RTX 3060 minimum ⚙️ CPU 8-Core+ Core i7 / Ryzen 7 💾 Storage SSD Media Cache के लिए अलग drive Full Comparison Complete Feature Comparison Table नीचे दी गई table में हमने दोनों software की हर important चीज़ compare की है। Feature / Spec 🎬 DaVinci Resolve 19 ✨ After Effects 2025 💰 Price Free (Studio ₹25,000) ₹1,600/माह (Adobe CC) 🧠 Minimum RAM 16 GB 16 GB 🧠 Recommended RAM 32–64 GB 32 GB 🖥️ GPU जरूरत बहुत ज़रूरी (GPU-heavy) ज़रूरी (CUDA/Metal) 🖥️ Minimum GPU VRAM 2 GB (Basic) / 8 GB (4K) 4 GB VRAM ⚙️ CPU Cores (Recommended) 12+ Cores 8 Cores (AE efficient) 💾 Software Size ~2.5 GB ~15 GB 🪟 Windows Support Windows 10/11 Windows 10/11 🍎 macOS Support macOS 12+ macOS 13+ 🐧 Linux Support हाँ (Ubuntu) नहीं 🎨 Primary Use Video Editing + Color Grading Motion Graphics + VFX 🔗 Internet Required नहीं (Free version) हाँ (Activation) 📈 Low-End PC Performance बेहतर (GPU efficient) Average (RAM heavy) 🤝 Integration Blackmagic Ecosystem Adobe Suite (Premiere, PS) Key Differences GPU, CPU, RAM — मुख्य अंतर क्या हैं? System requirements में numbers एक जैसे लग सकते हैं — लेकिन दोनों software उन्हें बिल्कुल अलग तरीके से use करते हैं। यह समझना बहुत जरूरी है। 🖥️ GPU — ग्राफिक्स कार्ड DaVinci Resolve GPU पर बहुत depend करता है। Color grading और effects के लिए NVIDIA/AMD का powerful card चाहिए। CUDA और OpenCL दोनों support करता है। After Effects भी GPU use करता है, लेकिन mainly CUDA (NVIDIA) पर। कुछ effects CPU-based हैं। GPU less critical है AE में। ⚙️ CPU — प्रोसेसर DaVinci Resolve में CPU और GPU दोनों मिलकर काम करते हैं। ज्यादा cores = ज्यादा smooth export। After Effects में कुछ effects purely CPU-based हैं। Single-core performance ज्यादा मायने रखती है। Intel का clock speed यहाँ काम आता है। 🧠 RAM — मेमोरी After Effects RAM को बहुत ज्यादा use करता है — खासकर RAM Preview के लिए। कम RAM में यह बार-बार preview purge करेगा। DaVinci Resolve भी 32GB चाहता है, लेकिन यह अपने GPU cache को ज्यादा use करता है। RAM usage comparatively smarter है। 💿 Storage — स्टोरेज DaVinci Resolve सिर्फ ~2.5GB लेता है install होने में। Project files अलग रखें। After Effects ~15GB लेता है। Plus Adobe cache काफी space खाता है। एक dedicated SSD media cache के लिए बेहतर रहता है। Low-End PC Low-End PC पर कौन बेहतर चलेगा? अगर आपके पास 8-16GB RAM है, integrated GPU है, या पुराना laptop/PC है — तो यह section आपके लिए है। 🎬 DaVinci Resolve Low-End Score 6.5/10 8GB RAM पर basic editing हो सकती है Integrated GPU पर limited features Free version में lite mode available Proxy workflow से performance boost होता है 4K editing के लिए dedicated GPU जरूरी ✨ After Effects Low-End Score 4.5/10 16GB RAM minimum for smooth work RAM preview बार-बार purge होती है Complex animations में heavy lag Reduce
Premiere Pro vs DaVinci Resolve – कौन सा Software Best है? (2026 Full Comparison Guide)
Introduction: Video Editing Software क्यों जरूरी हैं? Premiere Pro vs DaVinci Resolve Hindi आज के समय में वीडियो सिर्फ entertainment तक सीमित नहीं रहा, बल्कि यह एक strong career और business opportunity बन चुका है। YouTube channels, Instagram Reels, Freelancing projects, Online Courses, OTT content और Films—हर जगह professional video editing की भारी मांग है। आज brands और creators दोनों ही high‑quality, fast और engaging video content चाहते हैं। एक अच्छा video editing software editor को यह power देता है कि वह raw footage को professional‑grade output में बदल सके, colors को cinematic बना सके, audio को साफ और balanced रख सके, effects और transitions के जरिए storytelling को मजबूत करे और tight deadlines में भी तेज़ delivery दे सके। 2026 में market में कई editing tools available हैं, लेकिन Premiere Pro और DaVinci Resolve सबसे ज्यादा भरोसेमंद और widely‑used software बन चुके हैं। हालांकि, इन दोनों में से सही choice करना आसान नहीं है—क्योंकि सही software पूरी तरह आपकी जरूरत, budget, system configuration और future goals पर depend करता है। Software Overview Adobe Premiere Pro Adobe Premiere Pro, Adobe Creative Cloud का हिस्सा है और यह दुनिया के सबसे ज़्यादा इस्तेमाल होने वाले video editing software में से एक माना जाता है। Film industry, digital agencies और YouTubers इसे इसलिए पसंद करते हैं क्योंकि इसका workflow सीधा और समझने में आसान है। Timeline‑based editing की वजह से beginners भी जल्दी comfortable हो जाते हैं और professional editors fast delivery कर पाते हैं। Premiere Pro की सबसे बड़ी ताकत इसका Adobe ecosystem है। Lumetri Color से basic से लेकर advanced color correction आसानी से की जा सकती है। Audio के लिए इसमें strong in‑built tools मिलते हैं और जरूरत पड़ने पर Adobe Audition के साथ seamless integration हो जाता है। Motion graphics और animated text के लिए After Effects का direct support Premiere को content creators के लिए बहुत powerful बना देता है। DaVinci Resolve DaVinci Resolve, Blackmagic Design का all‑in‑one professional software है, जो खासतौर पर high‑end color grading के लिए famous है। यह सिर्फ एक editor नहीं, बल्कि editing, color correction, audio production और visual effects को एक ही software में combine करता है। यही वजह है कि film makers और advanced editors इसे ज्यादा prefer करते हैं। Resolve की सबसे बड़ी strength इसका powerful free version है, जिसमें भी professional‑level tools मिल जाते हैं। Node‑based color grading system editors को colors पर full control देता है, जो Premiere की तुलना में कहीं ज्यादा advanced है। Resolve GPU‑optimized है, इसलिए strong hardware पर यह बहुत smooth performance देता है। Fairlight audio page और Fusion VFX tools इसे complete post‑production solution बनाते हैं। Installation & System Requirements Platforms: Minimum / Recommended (Basic Editing): Low‑end systems पर Premiere ज्यादा forgiving है; Resolve hardware‑hungry है। Interface Comparison Interface किसी भी video editing software का सबसे important हिस्सा होता है, क्योंकि editor दिन का ज़्यादातर समय इसी screen पर काम करता है। Premiere Pro और DaVinci Resolve दोनों का approach अलग‑अलग है, और यही अंतर users के experience को तय करता है। Premiere Pro का interface traditional timeline‑based workflow पर चलता है। इसमें एक main timeline होती है, जिसके आसपास panels (Project, Source Monitor, Program Monitor, Effects आदि) लगे होते हैं। यह structure beginners के लिए जल्दी समझ में आ जाता है, क्योंकि ज़्यादातर tutorials और courses इसी तरह का workflow सिखाते हैं। Drag‑and‑drop editing, shortcuts और clear layout की वजह से नए editors बिना ज्यादा confusion के काम शुरू कर सकते हैं। DaVinci Resolve का interface थोड़ा अलग और ज्यादा professional approach follow करता है। इसमें page‑based workflow होता है, जैसे Cut, Edit, Color, Fusion और Fairlight। हर page एक specific काम के लिए बना होता है, जिससे advanced editors को focused environment मिलता है। हालांकि, beginners के लिए यह शुरू में थोड़ा overwhelming लग सकता है, क्योंकि हर stage पर नया layout दिखता है। Customization की बात करें तो Premiere Pro में panels और workspaces को अपनी जरूरत के हिसाब से पूरी तरह customize किया जा सकता है। Editors अपने workflow के अनुसार layout बना सकते हैं और save भी कर सकते हैं। वहीं DaVinci Resolve का layout ज्यादा structured और fixed रहता है, जो large projects और team workflows में consistency बनाए रखने में मदद करता है। कुल मिलाकर, अगर आप आसान और flexible interface चाहते हैं तो Premiere Pro बेहतर महसूस होगा। लेकिन अगर आप long‑term professional editing और film‑level workflow की तरफ जाना चाहते हैं, तो DaVinci Resolve का interface ज्यादा powerful साबित होता है। Editing Features Editing features किसी भी software की real strength दिखाते हैं, क्योंकि यहीं पर editor का रोज़ का ज़्यादातर काम होता है। Premiere Pro और DaVinci Resolve दोनों ही professional-level editing tools देते हैं, लेकिन उनका approach अलग है। Cutting और trimming के मामले में दोनों software तेज़ और accurate हैं। Premiere Pro में timeline पर cuts करना, ripple edits लगाना और shortcuts के साथ fast editing करना beginners के लिए आसान लगता है। वहीं DaVinci Resolve भी उतना ही precise है, लेकिन इसका workflow थोड़ा ज्यादा technical feel देता है, जो experienced editors को पसंद आता है। Multicam editing की बात करें तो Premiere Pro में multiple camera footage को sync करना और switch करना comparatively simple है। यही वजह है कि interviews, podcasts और YouTube shoots के लिए यह बहुत popular है। DaVinci Resolve multicam में ज्यादा advanced options देता है, खासकर color और audio sync के मामले में, जो complex projects में फायदेमंद होते हैं। Audio editing में दोनों software strong हैं, लेकिन फर्क approach का है। Premiere Pro basic से advanced audio editing के लिए काफी है और जरूरत पड़ने पर Adobe Audition के साथ seamlessly connect हो जाता है। दूसरी तरफ DaVinci Resolve का Fairlight audio system पूरी तरह professional audio workstation जैसा है, जो films और detailed sound design के लिए ज्यादा powerful साबित होता है। Motion graphics और text animation के लिए Premiere Pro का सबसे बड़ा फायदा After Effects integration है। Simple lower thirds से लेकर complex animations तक, workflow smooth रहता है। DaVinci Resolve में Fusion module मौजूद है, जो बहुत
₹1 Lakh में Best Video Editing PC Build (India 2026) – 4K Editing Ready Setup
आज के समय में video editing सिर्फ एक skill नहीं, बल्कि एक career option बन चुका है। YouTube creators, Instagram reel editors, freelance video editors और beginner filmmakers – सभी को एक ऐसे PC की जरूरत होती है जो heavy workload को बिना lag handle कर सके। Video editing में timeline smooth चलना, effects apply करते समय hang न होना और export जल्दी complete होना – ये सब directly आपके PC की power पर depend करता है। अगर आपका budget ₹1 लाख के आसपास है, तो यह Indian creators के लिए एक sweet spot माना जाता है। इस budget में आप ऐसा PC बना सकते हैं जो: इस article में हम 2026 के हिसाब से एक practical, balanced और future-proof ₹1 Lakh video editing PC build discuss करेंगे, जो beginners से लेकर intermediate editors तक सभी के लिए useful रहेगा। Video Editing PC Build Requirements (Simple Explanation) 1️⃣ CPU (Processor) – Editing का दिमाग CPU timeline playback, rendering और background processes handle करता है। Video editing के लिए CPU सबसे important component होता है। 2️⃣ GPU (Graphics Card) – Effects और Color Grading GPU का role editing में लगातार बढ़ रहा है। Achha GPU = faster export + smooth preview. 3️⃣ RAM – Multitasking का आधार RAM कम होगी तो timeline freeze और software crash के chances बढ़ जाते हैं। 4️⃣ Storage – Speed matters HDD सिर्फ backup के लिए use करनी चाहिए, editing के लिए नहीं। 5️⃣ Motherboard & PSU – Stability और safety Cheap PSU पूरे system को risk में डाल सकती है। ₹1 Lakh Video Editing PC Build (With Price Breakdown – India 2026) Note: Prices approx हैं, city और offers के हिसाब से थोड़ा ऊपर-नीचे हो सकते हैं। Component Recommended Part Why Video Editing के लिए Best Approx Price (₹) Processor (CPU) AMD Ryzen 7 5700X (8 Core / 16 Thread) Excellent rendering + smooth timeline ₹18,000 Motherboard B550 Chipset (MSI / ASUS / Gigabyte) Stable, future upgrade support ₹8,500 RAM 32GB (16×2) DDR4 3200MHz 4K editing + After Effects ready ₹7,500 Graphics Card (GPU) NVIDIA RTX 3060 12GB CUDA support, DaVinci + Premiere friendly ₹30,000 Storage 1TB NVMe SSD Gen 3 Fast cache + project loading ₹5,500 Power Supply 650W 80+ Bronze (Corsair / Cooler Master) Safe power delivery ₹4,500 Cabinet Airflow focused Mid-Tower Better cooling during long renders ₹4,000 CPU Cooler Aftermarket Air Cooler Stock cooler से बेहतर thermal ₹2,000 🔢 Total Approx Cost: 👉 ₹1,00,000 – ₹1,05,000 Software Compatibility यह build smoothly handle करता है: Total Cost Summary इस PC build की total cost ₹95,000 से ₹1,05,000 के बीच रहती है।GPU और RAM prices market में fluctuate होते रहते हैं, इसलिए final price थोड़ा differ कर सकता है। 👉 Tip: Festive sales और online offers में GPU पर अच्छा discount मिल सकता है। Performance Expectations (Realistic) 🔹 1080p Editing 🔹 4K Editing 🔹 Rendering & Export Optional Upgrades & Downgrades 🔻 Budget ₹90,000 करना हो तो 🔺 Budget ₹1.1 Lakh तक बढ़ाना हो तो 🔄 Future Upgrade Path Who Should Buy This PC? ✔ YouTubers (long-form + shorts)✔ Freelance video editors✔ Instagram reel editors✔ Beginner filmmakers✔ Editing agency starters अगर आप editing से earn करना चाहते हैं, तो यह PC investment long-term में value देता है। Common Mistakes to Avoid in PC Build ❌ RGB पर ज्यादा खर्च करना❌ Cheap local PSU use करना❌ 16GB RAM में 4K editing try करना❌ HDD से direct editing करना❌ Gaming CPU को blindly editing के लिए लेना FAQs ❓ क्या ₹1 लाख में 4K editing possible है? हाँ, सही configuration के साथ 4K editing smoothly possible है। ❓ Laptop बेहतर है या PC? Same budget में PC ज्यादा powerful और upgrade-friendly होता है। ❓ DaVinci Resolve के लिए GPU कितना जरूरी है? बहुत जरूरी। Resolve GPU-heavy software है। ❓ क्या future upgrade possible है? हाँ, RAM, GPU और storage easily upgrade हो सकते हैं। ❓ Beginners के लिए यह PC ज्यादा powerful तो नहीं? नहीं, यह future-ready है और सीखने के साथ grow करेगा। ❓ Editing के लिए Intel या AMD बेहतर? दोनों अच्छे हैं, लेकिन AMD multi-core rendering में better value देता है। Conclusion अगर आप video editing को serious career के रूप में देख रहे हैं, तो ₹1 लाख का PC build एक smart investment है।यह build सिर्फ आज के लिए नहीं, बल्कि आने वाले कई सालों तक आपके साथ grow करेगा। एक strong PC का मतलब है: 👉 Smartly invest करें, shortcuts से बचें और अपने creator journey को next level पर ले जाएँ।
YouTube पर AI की मदद से बिना चेहरा दिखाए पैसे कमाने की कंप्लीट गाइड (2025)
क्या आप भी YouTube चैनल शुरू करना चाहते हैं, लेकिन कैमरे के सामने आने से हिचकिचाते हैं? क्या आपको लगता है कि बिना चेहरा दिखाए सफलता मिलना मुश्किल है? तो आपकी यह सोच 2025 में पूरी तरह गलत साबित होने वाली है। आज के दौर में, AI टूल्स और YouTube ऑटोमेशन ने बिना कैमरा, बिना माइक और बिना अपनी पहचान जाहिर किए एक सफल चैनल चलाना पूरी तरह संभव बना दिया है। 2025 में भारत में फेसलेस चैनल्स का बोलबाला है, और इसके पीछे तीन बड़े कारण हैं: यह गाइड आपको स्टेप-बाय-स्टेप रास्ता दिखाएगी कि कैसे AI का इस्तेमाल करके एक प्रोफेशनल फेसलेस YouTube चैनल बनाया जाए, उसे ग्रो किया जाए और उससे अच्छी कमाई की जाए। AI Script Writing Read 1️⃣ फेसलेस YouTube चैनल क्या है? उदाहरण और फायदे एक फेसलेस YouTube चैनल वह चैनल है जहां क्रिएटर कभी भी कैमरे के सामने नहीं आता। इसकी पहचान उसकी आवाज़ या उसके कंटेंट की स्टाइल से नहीं, बल्कि कंटेंट की क्वालिटी, थंबनेल और प्रेजेंटेशन से बनती है। उदाहरण: “Mystery Lab”, “Think Fast”, “Financeपेडिया” जैसे चैनल्स, जो रहस्यमय कहानियाँ, मोटिवेशनल तथ्य या फाइनेंस टिप्स जैसा कंटेंट एनिमेशन, स्टॉक फुटेज और AI आवाज़ के जरिए बनाते हैं। फेसलेस चैनल के मुख्य फायदे: 2️⃣ 2025 के टॉप 5 AI फेसलेस चैनल आइडियाज़ नीचे दिए गए आइडियाज़ पर शोध किया गया है और इन्हें भारतीय दर्शकों के लिए टेलर किया गया है। याद रखें, क्वालिटी और ओरिजिनलिटी ही आपको आगे बढ़ाएगी। 1. मोटिवेशनल कोट्स & सक्सेस स्टोरीज यह नीच हमेशा ट्रेंड में रहता है, खासकर युवाओं और प्रोफेशनल्स के बीच। 2. AI न्यूज़ & टेक अपडेट्स जैसे-जैसे AI हमारी जिंदगी का हिस्सा बन रहा है, इसके बारे में जानने की लोगों की दिलचस्पी बढ़ रही है। 3. अनसुलझे रहस्य & फैक्ट्स एक्सप्लेनर रहस्य, इतिहास, विज्ञान के अनसुलझे पहलू हमेशा से दर्शकों को आकर्षित करते हैं। 4. फाइनेंस टिप्स (स्टॉक/मार्केट विज़ुअल्स के साथ) पैसों और निवेश की जानकारी की मांग हमेशा बनी रहती है। 5. गेमिंग हाइलाइट्स / AI गेमप्ले गेमिंग कम्युनिटी विशाल है, और अब AI की मदद से बिना खुद गेम खेले भी कंटेंट बनाना मुमकिन है। 3️⃣ स्टेप-बाय-स्टेप AI वर्कफ़्लो (फ्री और पेड टूल्स) एक फेसलेस चैनल चलाने का पूरा AI वर्कफ़्लो नीचे दिया गया है: 4️⃣ फेसलेस चैनल के लिए मोनेटाइजेशन के तरीके सब्सक्राइबर्स और वॉच टाइम बढ़ने के बाद, इन तरीकों से कमाई शुरू करें: 5️⃣ वायरल जाने और ग्रोथ के प्रैक्टिकल टिप्स 6️⃣ शुरुआत में ये कॉमन मिस्टेक्स न करें 7️⃣ अक्सर पूछे जाने वाले सवाल (FAQs) 1. क्या बिना चेहरा दिखाए बने चैनल मोनेटाइज होते हैं?हाँ, बिल्कुल होते हैं। YouTube का एल्गोरिदम कंटेंट की क्वालिटी, ऑडियंस रिटेंशन और वॉच टाइम को देखता है, न कि क्रिएटर के चेहरे को। 2. क्या AI वॉइस से बने वीडियो सुरक्षित हैं और मोनेटाइजेशन मिलेगा?हाँ, अगर आप हाई-क्वालिटी, नैचुरल साउंडिंग AI वॉइस का इस्तेमाल करते हैं और कंटेंट यूट्यूब पॉलिसी के अनुसार ओरिजिनल है, तो मोनेटाइजेशन में कोई दिक्कत नहीं होती। 3. फेसलेस चैनल के लिए YouTube पर क्या खास AI टूल्स हैं?YouTube क्रिएटर्स के लिए Dream Screen (AI बैकग्राउंड जनरेटर), AI पावर्ड इंस्पिरेशन टूल्स और ऑटो डबिंग जैसे टूल्स ऑफर करता है, जिनकी मदद से आप अलग-अलग भाषाओं के दर्शकों तक पहुँच सकते हैं। 4. क्या मैं 100% AI का इस्तेमाल करके पूरा वीडियो बना सकता हूँ?तकनीकी रूप से हाँ, लेकिन सिर्फ AI पर निर्भर रहने से कंटेंट में दोहराव आ सकता है। सबसे अच्छी रणनीति AI को अपना असिस्टेंट बनाने की है, न कि रिप्लेसमेंट। अपनी रिसर्च और एडिटिंग से कंटेंट में यूनिक टच जोड़ें। 5. कौन सी निचे सबसे ज्यादा कमाई देती है?फाइनेंस, टेक्नोलॉजी और ऑनलाइन अर्निंग जैसी निचेस में CPC (कॉस्ट पर क्लिक) ज्यादा होता है, जिससे विज्ञापनों से कमाई अधिक होती है। साथ ही, इनमें एफिलिएट मार्केटिंग और ब्रांड डील्स की भी अधिक संभावना होती है。 6. क्या फेसलेस चैनल के लिए YouTube शॉर्ट्स जरूरी है?बहुत जरूरी है। शॉर्ट्स नए दर्शकों तक पहुँचने का सबसे तेज तरीका है और इनसे भी अलग से कमाई (रेवेन्यू शेयरिंग) हो सकती है। 8️⃣ निष्कर्ष: छोटी शुरुआत, बड़ी कामयाबी YouTube पर AI फेसलेस चैनल्स 2025 में भारत में एक बड़ा अवसर है। सफलता का राज शुरुआत करने में है। एक निच चुनें, अपना पहला वीडियो बनाएं—चाहे वह कितना भी साधारण क्यों न हो—और उसे अपलोड कर दें। कंसिस्टेंट रहें, अपने दर्शकों की प्रतिक्रिया से सीखें, और धीरे-धीरे अपने वर्कफ़्लो और कंटेंट क्वालिटी को सुधारते जाएं। याद रखें, आज YouTube पर जो बड़े क्रिएटर्स दिख रहे हैं, उन्होंने भी कभी पहला विडियो अपलोड किया था। आपका चेहरा नहीं, आपका कंटेंट आपकी पहचान बनेगा। तो देर किस बात की? आज ही अपने सफर की शुरुआत करें।
Why short videos are booming in India 2025

क्या आपने भी देखा है कि 2025 में आपका हर दूसरा दोस्त Reels, Shorts या फिर YouTube पर छोटे Videos बना रहा है? और कुछ तो ऐसे Viral हो रहे हैं कि नाम और पैसा दोनों कमा रहे हैं! भारत में Short Videos की दुनिया सचमुच धमाल मचा रही है। कारण साफ़ है: हमारे पास समय कम है, और मनोरंजन की भूख ज़्यादा। एक Busy इंसान के लिए 10 मिनट का वीडियो देखना मुश्किल है, लेकिन 30 सेकंड का Engaging Reel? वो तो बस स्क्रॉल करते-करते देखा और लाइक कर दिया! इस Boom के पीछे सिर्फ TikTok ही नहीं, बल्कि YouTube Shorts और Instagram Reels का पूरा Ecosystem है। पहले Viral होने के लिए बड़ा बजट, कैमरा और टीम चाहिए थी। आज? आपका फ़ोन और थोड़ी सी AI की समझ ही आपको एक बेहतरीन Creator बना सकती है। इस ब्लॉग में, हम आपको AI Tools की मदद से Professional और Trending Short Videos बनाने का Step-by-Step रास्ता दिखाएँगे। चिंता मत कीजिए, यहाँ सब कुछ शुरुआत से, आसान हिंदी में और ज़्यादातर फ्री टूल्स के साथ बताया जाएगा। तो चलिए, शुरू करते हैं! 3️⃣ Section: Why AI tools are helpful for short video creation शायद आप सोच रहे होंगे – “मैं तो खुद ही Video बना लेता हूँ, AI क्यों?” बिल्कुल वाजिब सवाल। लेकिन AI आपकी Creativity को कम नहीं, बल्कि कई गुना बढ़ा देता है। ये एक ऐसा Smart Assistant है जो 24×7 आपके साथ है। AI Tools आपकी कैसे मदद करते हैं? मतलब, AI आपका Creative Partner है। वो वही Heavy Lifting करेगा, ताकि आप अपनी Energy असली Creativity – Idea, Expression और Presentation पर लगा सको। 4️⃣ Step-by-Step Guide Step 1: AI से Trending Topic & Niche Selection सबसे पहला कदम: किस चीज़ पर Video बनाऊँ? बिना Planning के बनाया Video शायद ही कभी चले। Step 2: Script Writing using AI Prompts (Give Example Prompts) Topic मिल गया? अब उसे 15-60 सेकंड की कहानी में बदलना है। यहाँ AI आपका Best Friend बन जाता है। Step 3: Free AI Voice Generation + Microphone Tips Voiceover से Video का आधा Effect तय होता है। अगर आपकी आवाज़ Record करने में दिक्कत है, या फिर बैकग्राउंड नॉइज़ है, तो AI Voice आपको बचा सकती है। Step 4: Visual Suggestions (Recording + Stock Footage + AI Suggestions) अब बारी है दिखाने की! Video में क्या-क्या दिखेगा? Step 5: Free Mobile Editing Apps (CapCut, VN, Canva) सारा Material तैयार है? अब सबको जोड़कर एक शानदार Video बनाने का वक़्त! शुरुआत के लिए मेरी सलाह है: CapCut डाउनलोड करो और उसके 2-3 Tutorials YouTube पर देखो। आप Expert बन जाओगे! Step 6: Auto-Captions using AI एक राज की बात: 80% से ज़्यादा लोग Social Media पर Videos बिना आवाज़ के (Mute पर) देखते हैं। अगर आपके Video में Captions नहीं, तो आप 80% Audience खो रहे हैं! Step 7: Upload Optimization (Titles, Tags, Hashtags) Video बन गया? बधाई हो! लेकिन काम अभी खत्म नहीं हुआ। Upload करते वक़्त इन बातों का ध्यान रखें: 5️⃣ Extra Tips: How to Increase Watch-time & Virality 6️⃣ Internal Link Placeholders 7️⃣ FAQs: 6–8 Common Questions Q1. क्या AI से बने Videos Monetize हो सकते हैं? (YouTube/Instagram)A. हाँ, लेकिन शर्तें हैं। YouTube Shorts Fund या Instagram Bonus के लिए, Content Original और Value-Adding होना चाहिए। सिर्फ AI Voice या AI Script से कोई दिक्कत नहीं, लेकिन पूरा Video अगर AI Generated Footage से भर देंगे तो Issues आ सकते हैं। AI को Assistant की तरह Use करो, Owner की तरह नहीं। Q2. क्या AI Voice का Use Safe है? कॉपीराइट नहीं लगेगा?A. ज़्यादातर Free AI Voice Tools आपको Commercial Use की Permission देते हैं (हमेशा उनकी ‘Terms of Use’ चेक कर लें)। ElevenLabs जैसे Platforms पर भी License Details दी होती हैं। सुरक्षित रहने के लिए, उन्हीं Voices का Use करें जिनके लिए Platform Permission दे रहा है। Q3. मुझे Editing बिल्कुल नहीं आती। क्या करूँ?A. कोई बात नहीं! CapCut और Canva में Pre-made Templates का खजाना है। बस अपना Video/Photo Template में ड्रॉप करो, Text बदलो – Video तैयार! धीरे-धीरे सीखते जाओगे। Q4. सबसे Best Free AI Tool कौन सा है?A. एक नहीं, Combination Use करो!* Ideas & Script: ChatGPT/Gemini* Editing & Captions: CapCut* Graphics & Template Videos: Canva* Voice: CapCut का In-built Generator या Google TTS Q5. Video कितना Long होना चाहिए?A. Trend देखो! 2025 में, 15-30 सेकंड के Videos सबसे ज़्यादा Engage कर रहे हैं। Hook तेज़ रखो, Message Clear रखो। Q6. मेरे Videos Views नहीं आ रहे। क्या गलती हो सकती है?A. शायद Thumbnail Weak है, या पहले 3 सेकंड Boring हैं। या फिर आप Consistent नहीं हैं। Video Quality, Upload Time, और Niche पर फिर से गौर करें। एक ही तरह के Videos बनाते रहें, Algorithm आपको पहचान लेगा। 8️⃣ Conclusion — Encouraging New Creators दोस्तों, आज का दौर Creator बनने का सबसे बेहतरीन दौर है। Tools आपके हाथ में हैं, Audience मौजूद है, और जो काम पहले Impossible लगता था, वो AI की वजह से Possible हो गया है। आपकी Unique Story, आपका Perspective – यही आपकी सबसे बड़ी ताकत है। AI Tools सिर्फ वो Paintbrush हैं, जिससे आप अपनी कल्पना की तस्वीर बना रहे हैं। पहला Video बनाओ, दसवाँ Video बनाओ। शर्माओ मत, सीखो। Analyze करो कि क्या अच्छा लगा, क्या सुधारना है। ये सफर एक Marathon है, Sprint नहीं। शुरुआत कर दो। आज ही। अपना फ़ोन उठाओ, पहला Step 1 Follow करो, और एक Draft Video बनाकर देखो। आप ख़ुद हैरान रह जाओगे कि आप क्या बना सकते हो!
How Much Can You Earn as a Freelance Video Editor in India? (2025 Guide)
Video content is exploding everywhere—on YouTube, Instagram Reels, OTT platforms, corporate branding, and even personal content creators’ channels. With this rise, video editing has become one of the most in-demand freelance skills in India. Many creative professionals are asking the same question: 👉 “How much can I really earn as a freelance video editor in India?” In this detailed guide, we’ll break down average salaries, earning models, city-wise variations, real-world examples, and growth opportunities to give you a clear picture of freelance video editing income in 2025. Understanding the potential for Video Editor Career Growth is essential for those considering this path. Why Choose Freelance Video Editing in India? Before we jump into numbers, let’s quickly understand why freelancing is attractive in this field: Average Freelance Video Editor Salary in India (2025) Freelance earnings are not fixed like a job. They depend on skills, clients, city, and experience. But data from top platforms gives us a realistic range: Source / Platform Average Annual Salary (₹) Range (₹) Salary.com (2025 India data) 7,92,336 6,40,883 – 9,91,014 AmbitionBox (113 salaries) 3,00,000 2,00,000 – 6,00,000 Upwork Freelancers 1,90,000 – 5,00,000 Depends on hours/projects Freelancer.com Freelancers 2,00,000 – 7,00,000 Highly varied Real Reddit Freelancers 3,60,000 – 4,80,000 ₹30k – ₹40k per month Chegg India (Hourly rates) ₹500 – ₹5,000/hr ₹5k – ₹50k/project Key Insight: On average, freelance video editors in India earn between ₹3 LPA and ₹7 LPA, with top professionals crossing ₹10 LPA annually. Freelance Earning Models (How You Get Paid) Unlike jobs, freelancing offers flexible earning models. Here are the most common: 1. Hourly Rates 👉 Example: Editing a 10-minute YouTube video may take 4 hours, earning a beginner ₹2,000 to ₹6,000. 2. Per Project Rates 👉 Example: A wedding highlight video can fetch ₹20k–₹40k per project. 3. Monthly Retainers Some clients (YouTubers, agencies) prefer monthly contracts. City-wise Salary Breakdown in India Location also impacts freelance video editing rates. 👉 But freelancing is location-independent. If you work with international clients via Upwork or Fiverr, you can earn in USD ($15–$60/hr)—that’s ₹1,200–₹5,000/hr! Real-World Insights from Freelancers Data is good, but let’s hear what freelancers are saying: “A good beginner editor would expect at least ₹30–40k per month in India.” “In Delhi, editors with 2–3 years of experience charge ₹5k a shift, while seniors take ₹10–12k.” These stories show that skills + networking = higher earnings. Skills That Boost Your Earnings To stand out and charge more, you must go beyond basic editing. High-paying clients look for editors with specialized skills: 👉 The more advanced your skillset, the higher your freelance value. How to Increase Your Freelance Video Editing Income Here are practical steps to maximize earnings: Future Scope: Will Freelance Video Editors Earn More in 2030? Absolutely. With AI tools speeding up editing but human creativity still being unmatched, the demand will only rise. Conclusion So, how much can you earn as a freelance video editor in India? Your earnings depend less on “what companies pay” and more on how well you market yourself, upgrade your skills, and build client trust. In short—a freelance video editor in India can earn anywhere from ₹3 LPA to ₹15 LPA+, with limitless growth for those who specialize and think global.
Kreo Owl 1080p Webcam Review: Is This Budget-Friendly Device Your Next Video Hero?
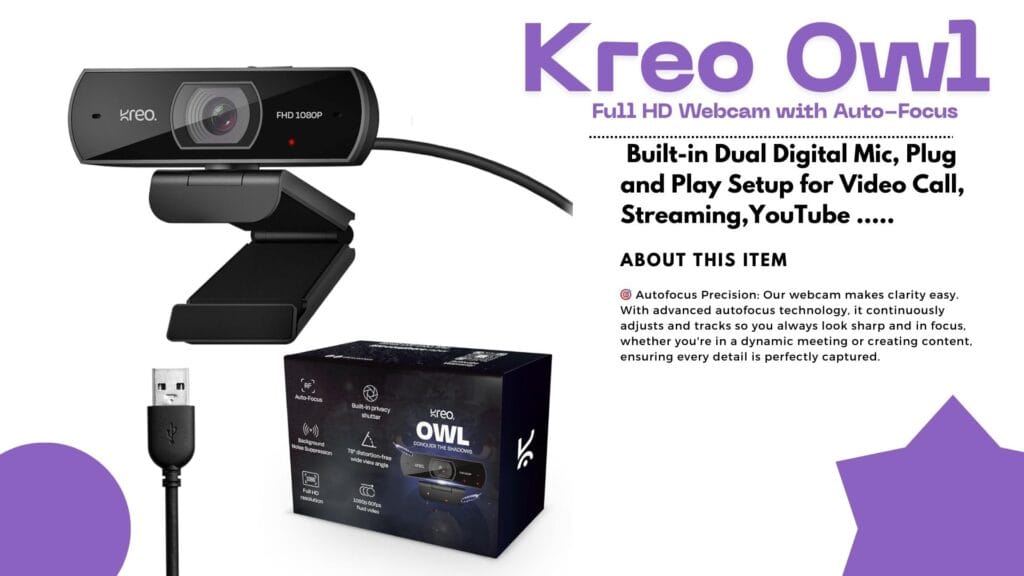
Introduction: Why Reliable Video Matters Ever found yourself ready for a crisp, professional Zoom call or a game stream—only for your old webcam to leave your face looking blurry and tired? If you’ve been hunting for a webcam that’s smooth, vibrant, and affordable, the Kreo Owl might just be your new desk buddy! Today, we dive deep into the Kreo Owl 1080p Webcam Review, its standout features, real user experiences, and how it stacks up against the competition. Quick Overview: The Essentials Detailed Analysis: Kreo Owl 1080p Webcam Review What’s Awesome About the Kreo Owl Webcam? Big on Features, Small on Hassle User Experience: Quick, Easy, Reliable Unboxing the Kreo Owl is satisfying—solid ABS plastic construction, sturdy monitor clip, and a wide, glass lens. Setup? Simply plug it in. Windows or Mac, no drivers needed. Users love the quick setup and fast adaptation to video platforms like Zoom, Teams, Skype, and OBS. Real User Reviews: What People Actually Say Positive Vibes Not-So-Perfect Points Performance in Action Tested for online classes and gaming streams, the Kreo Owl performed admirably in well-lit rooms. The mic kept background noise to a minimum, while the privacy shutter proved handy between meetings. On the downside, rooms with poor lighting revealed some limitations; boosting brightness fixed most issues. Kreo Owl vs. Top Competitors How does the Kreo Owl compare with big names like Logitech and Razer? Let’s see! Feature Kreo Owl 1080p Logitech C920 Razer Kiyo X Resolution 1080p/60FPS 1080p/30FPS 1080p/60FPS Auto-Focus Yes Yes Yes Built-in Mic Dual Stereo Single Privacy Shutter Yes Yes No Price Range Budget Mid-Range Premium Ring Light Basic No Yes The Bottom Line:The Kreo Owl delivers most modern features at a price that’s often half of the competition. If you crave top-tier software and brand cachet, you’ll favor Logitech or Razer. For core online meetings and streams—Kreo Owl is more than enough! Pros and Cons Breakdown Pros Cons Who Should Pick the Kreo Owl? If you need sharp video and solid sound for online calls, classes, or streaming—and don’t want to break the bank—this is a sensible choice. Teachers, small business owners, students, and casual streamers will love the price-performance combo. If you’re a full-time content creator craving studio-level control, software perks, or marketing bragging rights, consider the premium brands instead. Value: Is It Worth Your Money? Absolutely, if reliability, ease of use, and great value matter to you. Comparing price and features, Kreo Owl punches above its weight, making it ideal for most everyday users. Final Thoughts: Should You Buy? The Kreo Owl 1080p Webcam does what it promises—and more. For classroom heroes, budget-conscious professionals, or first-time streamers, this webcam is a worthy investment. It’s not perfect, but it’s practical and friendly, just like the people who use it. Ready to upgrade your video calls and make a smarter buying decision? The Kreo Owl might just be your perfect match! Did you find this review helpful? Share your thoughts and experiences below, or grab your Kreo Owl now and let crisp video boost your next call!
Dhruv Rathee Style Editing Secrets Revealed
FRONTECH Ultima Series 24 Inch Curved LED Monitor Review – Best Editing Monitor Under ₹5,999 in 2025?
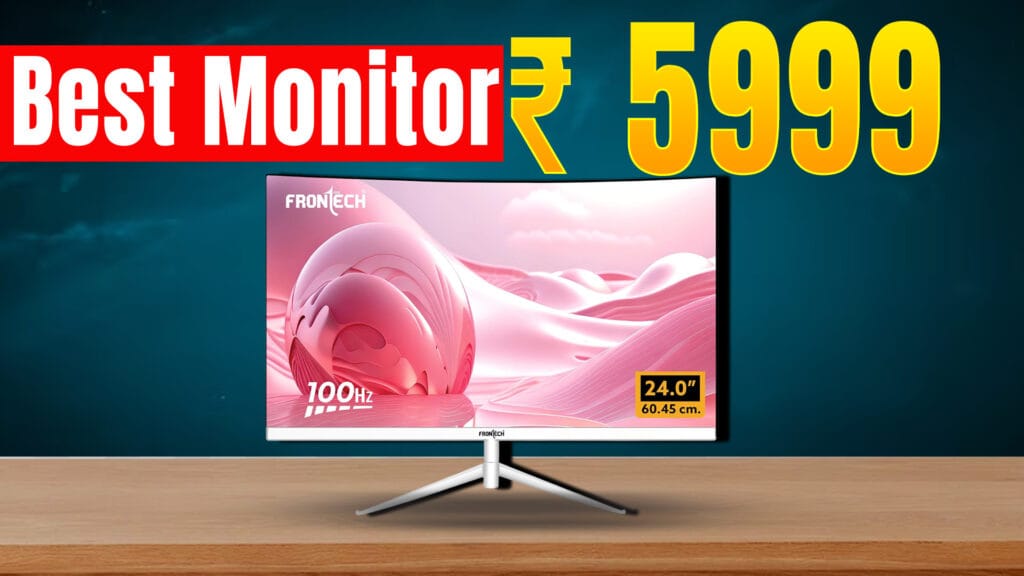
Looking for an affordable yet feature-packed editing monitor in 2025? The FRONTECH Ultima Series 24 Inch Curved LED Monitor (Model MON-0080) is gaining popularity for its curved design, smooth visuals, and reasonable price point of around ₹6,439 on Amazon India with a 3-year warranty. Design and Display The monitor sports a 24-inch curved VA panel with an 1800R curve, offering an immersive viewing experience that is especially useful when editing videos and photos. It has a Full HD resolution (1920 x 1080 pixels) with crisp and vibrant visuals that help keep colors accurate and consistent. The bezel-less design maximizes screen space, making it ideal for multitasking and professional workflows. Performance and Features Connectivity and Build The monitor includes essential ports for modern and legacy devices: These ports make the FRONTECH MON-0080 compatible with laptops like MacBook Pro, desktops like Mac Mini, and other mainstream computers. It comes with a sleek white finish and a sturdy metallic stand that allows slight tilt adjustments for ergonomics. Pricing and Availability Priced around ₹6,439 with free delivery on Amazon India and supported by a 3-year warranty, it offers outstanding value for budget-conscious buyers. It also has received mostly positive reviews, highlighting smooth performance and good color quality for the price. Limited EMI options and bank offers increase its affordability. Who Should Buy This Monitor? This monitor is ideal for: Final Verdict For those on a budget searching for the best editing monitor under ₹10,000 in 2025, the FRONTECH Ultima MON-0080 is a strong contender. With its curved design, 100Hz refresh rate, color accuracy, and versatile connectivity, it punches above its weight in delivering value for editing and multimedia tasks.
🎮 Nvidia GeForce Now RTX 5080 Upgrade – Kya Boss, Cloud Gaming Ka Level Hi Kya Badal Diya! 🚀
Bhaiyo aur behno, agar tum hardcore gamer ho ya bas casual FPS shooter khelne wale ho, toh suna! Nvidia ne apni GeForce Now cloud gaming service ko itna upgrade kiya hai ki gaming ka future ab haqeeqat jaisa lagne laga hai. RTX 5080 SuperPods ke sath ab tumhara gaming experience ekdum next-level hone wala hai! ⚡Next-Gen Gaming Power with RTX 5080 Nvidia ne apna latest RTX 5080 GPU laaya hai jisme 62 teraflops ki power hai! Matlab? Graphics ekdum ultra-HD crisp, frame rates super smooth 120 FPS tak, aur resolution 5K tak support milega. Aur DLSS 4 technology ka use karke tumhare game ki speed hogi 2.8x zyada — matlab jitna bhi heavy game ho, wo ab easily chalega. 🎥 Cinematic Streaming Ka Jalwa Boss, ye streaming sirf gaming tak hi limited nahi hai. Nvidia ne Cinematic Quality Streaming (CQS) bhi launch kiya hai. Isme HDR10, AI video filters aur 100 Mbps bandwidth milega, jo tumhare game ko ekdum movie-like visual effects de dega. Matlab no more boring low-res streams! Full of realistic colors and a cinematic vibe. 📚 Double Game Library – Install Karke Save Karna Bhoolna Nahi! Ab tum 4,500+ games GeForce Now pe directly cloud par install kar sakte ho with Install-to-Play feature. Storage options bhi dhansu hai — 100GB free, aur agar chahiye toh 1TB tak ka option bhi milta hai at sahi price. Massive library matlab Fortnite, Cyberpunk, GTA 6 sab ek jagah, bina kisi tension ke! 📱 Sab Devices Ko Full Support – Steam Deck, LG TV, Lenovo Ka Dum Chahe tum Steam Deck pe ho ya Lenovo Legion Go pe, ya fir apne bade LG TV pe, Nvidia tumhe 90-120 FPS tak ka smooth gameplay deta hai. LG ke naye 5K monitors bhi ready hain for 120Hz refresh rate streams. Matlab, no lag, no buffering — sirf full-on gaming maza! 💰 Price Bhi Same, Matlab Bajaar Ki Duniya Me Full Deal! Sabse badi baat? Itni zabardast upgrade ke baad bhi Nvidia ne price wahi rakha — Ultimate plan $19.99/month aur Performance plan $9.99/month. Bina extra kharcha ke mil raha hai aaj ke zamane ka sabse powerful cloud gaming experience. 🎉 Final Thoughts – Cloud Gaming Ka Boss Hai Nvidia! Bhaiyon, cloud gaming ka future ab clear ho gaya hai. RTX 5080 ke saath Nvidia ne GeForce Now ko ekdum supercharged bana diya, jisse heavy PC ke bina bhi tum high-end AAA games ka maza le paoge. Bas apna internet pakka karo, aur ready ho jao epic gaming ke liye! Ab gaming sirf ek machine ki baat nahi, pura cloud ka khel hai! ☁️🎮🔥 👉 Tum kya sochte ho? Kya GeForce Now future ka sabse bada game changer banega? Comments mein batao! Is style mein maza bhi aata hai aur trending keywords bhi cover ho jaate hain jaise: RTX 5080, next-level gaming, cinematic streaming, 120 FPS, cloud gaming, AAA games, Steam Deck, aur GTA 6!
YouTube Monetization Rules 2025: क्या बदलाव आए हैं, और AI कंटेंट क्रिएटर्स के लिए नए नियम क्या हैं?
YouTube ने 15 जुलाई 2025 से अपने YouTube Monetization Rules में बड़े बदलाव किए हैं। इन अपडेट्स का सीधा असर उन कंटेंट क्रिएटर्स पर पड़ेगा जो यूट्यूब से पैसे कमाते हैं या कमाने की सोच रहे हैं। सबसे बड़ा फोकस इस बार AI-generated content और पारदर्शिता (transparency) पर है। The evolution of YouTube has been remarkable since its inception. As a platform that allows creators to share their ideas and content globally, YouTube has continuously adapted to the changing landscape of digital media. With the rise of artificial intelligence and its integration into content creation, these new monetization rules are a crucial step to ensure fairness and transparency in the creator ecosystem. These rules not only cater to existing creators but also set a standard for emerging creators who are looking to leverage AI tools in their content processes. Understanding these nuances will be essential for both new and seasoned creators. 1. नए Monetization Rules क्या हैं? 2. कंटेंट क्रिएटर्स के लिए क्या Impact पड़ेगा? 3. SEO Tips — नए नियमों में वीडियो कैसे Rank करें? 4. FAQs Q: क्या AI Videos अब MonetiZation के लिए Allow हैं? A: Allow हैं, लेकिन साफ डिस्क्लोज करना और Copyright Norms फॉलो करना जरूरी है। Q: New Rules कब से लागू हैं? A: 15 जुलाई 2025 से। Q: क्या पुराने Videos पर भी ये नियम लागू होंगे? A: यदि वे अभी भी Monetized हैं, तो Disclosure जरूरी है। निष्कर्ष The impact of these changes on content creators cannot be overstated. They introduce a level of accountability that can potentially reshape the content landscape on YouTube. For instance, a creator who typically produces videos on DIY crafts might find themselves re-evaluating their approach to include a transparent discussion about the use of AI tools for inspiration. अगर आप Content Creator हैं या शुरुआत कर रहे हैं, तो इन नए नियमों को ध्यान से समझकर स्ट्रेटेजी बनाएं। स्पष्ट व पारदर्शी अप्रोच, ओरिजिनल कंटेंट और Responsible AI Usage——बस यही आज के यूट्यूब की जरूरत है। Pro Tip: YouTube Updates और Best Practices के लिए BBC News Hindi जैसे Reliable News Channels को Regularly Follow करें। Trends अपनाएं, लेकिन Authenticity न छोड़ें—यही Long-Term Success का राज़ है! **#YouTubeMonetization #AIVideos #YouTubeRules #ContentCreators #TransparencyInContent #MonetizationStrategies As YouTube emphasizes transparency, creators should be prepared to adopt a more open dialogue with their audiences. This can involve sharing the creative process behind videos, including how AI tools are utilized, which can foster trust and engagement with viewers. Originality remains a cornerstone of effective content creation. For example, a cooking channel could stand out by blending traditional recipes with AI-generated suggestions for modern twists, thus providing unique value to their viewers. This not only enhances viewer engagement but also adheres to the new monetization guidelines. Additionally, creators should consider the broader implications of these rules on their content strategy. For example, how will they approach video titles and descriptions to ensure they accurately reflect the content creation process? This could lead to more thoughtful and engaging content that reflects the creator’s unique voice while adhering to YouTube’s guidelines. The importance of community interaction cannot be overlooked. Creators can ask for viewer feedback in the comments section or even conduct polls to decide future content directions, thereby enhancing viewer involvement and satisfaction. Furthermore, staying up-to-date with YouTube’s evolving best practices is crucial for long-term success. Creators should actively seek out educational resources, webinars, and workshops that focus on YouTube monetization and its implications for AI-generated content. Building a network with other creators can also provide valuable insights and support. In conclusion, the landscape of YouTube monetization is changing, and staying informed will be vital for success. As the platform continues to adapt to new technologies and audience expectations, creators must also evolve. By embracing these new rules and focusing on originality, transparency, and community engagement, content creators can thrive in this new era of YouTube monetization.
🎨 Graphic Designer vs Video Editor Salary in India (2025) – Who Earns More?
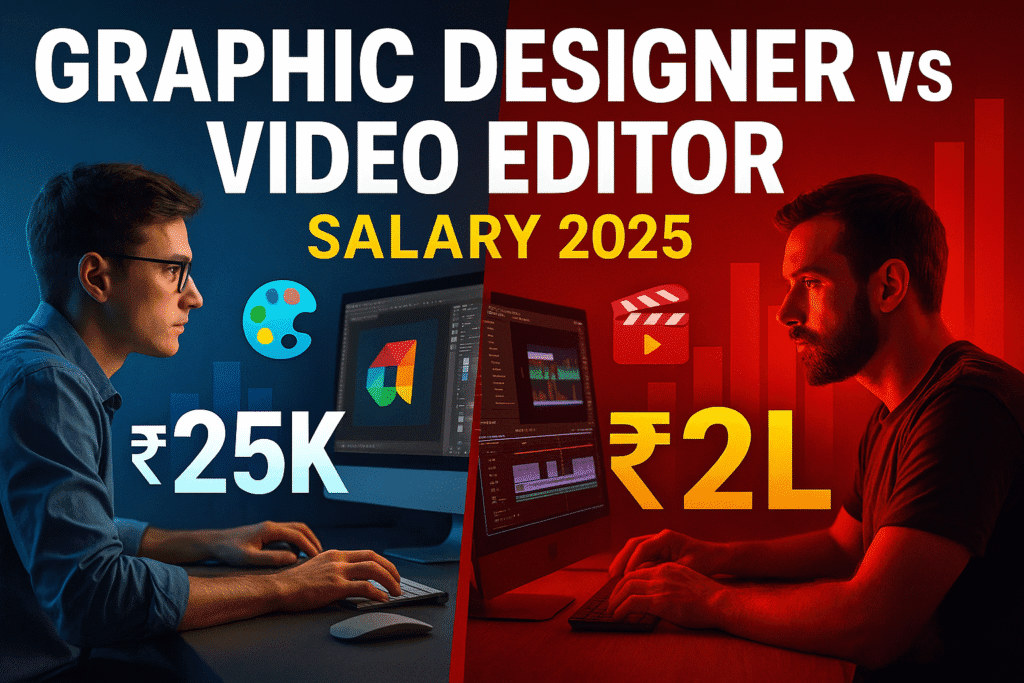
Graphic Designer vs Video Editor Salary in India
Master the Johnny Harris Style: Newspaper Animation in After Effects
If you’re a fan of Johnny Harris or Vox’s documentary videos, you’ve probably noticed the sharp newspaper-style animations, kinetic headlines, and seamless transitions. These elements are not just eye-catching; they serve a purpose in storytelling and audience engagement. Good news? You can replicate that exact aesthetic inside Adobe After Effects — no fancy plugins needed. In this tutorial, you will learn to Master the Johnny Harris Style, an approach that will elevate your video production skills and help you create compelling narratives that captivate your audience. In this video tutorial, you’ll learn: But before we dive into the tutorial, let’s discuss why this style is so effective. The combination of visual elements not only grabs attention but also enhances the storytelling by providing context and emotional cues to the viewers. By mastering these techniques, you will be able to create videos that resonate with your audience on a deeper level. 🔹 Examples of successful use of this style in documentaries and short films 🎯 Pro Tip: Keep your camera movements minimal but purposeful. Combine push-ins with sound cues and voiceover pauses to mimic the classic Johnny Harris rhythm. Whether you’re crafting a political explainer, a historical reel, or a geo-narrative story — this style adds instant credibility and cinematic polish. 🔹 How to adapt this style for different genres — be it travel, history, or social issues 🎯 Pro Tip: Use a consistent color palette throughout your project to maintain visual coherence. Consider how colors can evoke particular emotions and enhance the atmosphere of your story. ✅ Tools Used: As we proceed, remember that every element you include — from sound design to graphic overlays — plays a critical role in your video’s overall impact. Practice these techniques regularly, and soon you will find your unique voice within this style. 📌 Final Thought: Mastering this style doesn’t just make your video look cool — it helps tell stories visually and hold attention in a scroll-happy world. The techniques involved in this style teach you not only about aesthetics but also about pacing, rhythm, and the importance of visual storytelling. By embracing the Johnny Harris approach, you can produce videos that not only inform but also inspire and engage your audience effectively. Mastering this style doesn’t just make your video look cool — it helps tell stories visually and hold attention in a scroll-happy world. If you’re a fan of Johnny Harris or Vox’s documentary videos, you’ve likely admired the distinctive newspaper-style animations, dynamic headlines, and smooth transitions. Fortunately, you can achieve this precise look in Adobe After Effects without the need for elaborate plugins. In this instructional video, you will discover how to: 🎯 Pro Tip: Maintain deliberate and subtle camera movements. Pair zoom-ins with audio cues and pauses in narration to capture the signature Johnny Harris tempo. Whether you’re developing a political analysis, a historical compilation, or a geographic narrative, incorporating this style instantly enhances credibility and provides a cinematic touch. ## ✅ Tools Utilized: ## 📌 Parting Note: Mastering this technique not only enhances the visual appeal of your videos but also aids in conveying narratives effectively and retaining viewers’ attention in an era of constant scrolling. The journey to mastering this art is ongoing. Don’t hesitate to experiment with different tools, styles, and techniques as you develop your skills. The more you practice, the more intuitive these techniques will become, allowing you to tell more compelling stories.